
Without Writing Code
Instantly create a wide variety of applications without writing any code.
The Rebol App Builder generates code for you. No experience necessary.
Follow along and learn how to build 73 included example programs.
By: Nick Antonaccio
Contents:
1. What is the Rebol App Builder?2. Getting Started With The Rebol App Builder
2.1 Download
2.2 Just Point and Click
3. Example Apps
3.1 my-all-gui-widgets.r
3.2 my-hello-world1--print.r
3.3 my-hello-world2--alert.r
3.4 my-hello-world3--alert-value.r
3.5 my-hello-world3b--alert-field-value.r
3.6 my-hello-world4--set-face-field.r
3.7 my-display-time.r
3.8 my-cam-video.r
3.9 my-hello-world5--write.r
3.10 my-hello-world6--alert-variable-word.r
3.11 my-hello-world7--text-list.r
3.12 my-browse-favorites.r
3.13 my-hello-world8--drop-down.r
3.14 my-hello-world9--get-face-drop-down.r
3.15 my-hello-world10--attempt-get-face-drop-down.r
3.16 my-hello-world11--set-box-properties.r
3.17 my-hello-world12--rejoin.r
3.18 my-slider.r
3.19 my-slider2.r
3.20 my-compliment-maker.r
3.21 my-notepad.r
3.22 my-web-page-editor.r
3.23 my-add-2-fields.r
3.24 my-stopwatch.r
3.25 my-sliding-tile-game.r
3.26 my-clipboard-grabber-saver.r
3.27 my-days-between.r
3.28 my-tip-calculator.r
3.29 my-block-demonstration.r
3.30 my-image-effects.r
3.31 my-todo.r
3.32 my-random-values.r
3.33 my-coin-flip.r
3.34 my-coin-flip--with-images.r
3.35 my-math-quiz.r
3.36 my-math-quiz2.r
3.37 my-move-button-randomly.r
3.38 my-compliment-generator.r
3.39 my-parse-IP-address.r
3.40 my-calculator.r
3.41 my-if-example--morning-noon-afternoon.r
3.42 my-guess-the-random-number-game.r
3.43 my-sliding-tile-game2.r
3.44 my-either-example--password-validation.r
3.45 my-either-example2--checked-unchecked.r
3.46 my-blogger.r
3.47 my-ftp-tool.r
3.48 my-cam-video2.r
3.49 my-foreach-demonstration.r
3.50 my-foreach-and-repeat-loop-examples.r
3.51 my-timer.r
3.52 my-char-day-printer--loop-example.r
3.53 my-99-bottles-of-beer.r
3.54 my-sound-player.r
3.55 my-continuously-echo-clipboard-to-file.r
3.56 my-paypal-report.r
3.57 my-calendar.r
3.58 my-contacts.r
3.59 my-mailer.r
3.60 my-share-files.r
3.61 my-bar-chart.r
3.62 my-madlib.r
3.63 my-chat.r
3.64 my-network-sender.r
3.65 my-network-receiver.r
3.66 my-draw-dialect-default-example.r
3.67 my-draw-animate-example.r
3.68 my-cash-register.r
3.69 my-cash-register-report.r
3.70 my-jam-session-chord-looper.r
3.71 my-function-example.r
3.72 my-countdown-timer.r
3.73 my-generic-crud-database.r
4. General Rebol Help
5. Advanced Users
6. A 5 Minute Rebol Language Tutorial To Be Used With The App Builder
6.1 Getting Started with Graphic User Interfaces ('GUIs' or 'UIs')
6.2 Actions
6.3 Data Sources
6.4 Blocks (Series) - Rebol Data Structures
6.5 Functions
1. What is the Rebol App Builder?
The Rebol App Builder is a code generator which creates apps (computer programs, applications) using easy to understand code in the Rebol programming language. Just point-and-click the simple wizard interface to select GUI widgets (Graphic User Interface components such as buttons, text fields, drop-down selectors, etc.), and then choose actions and data sources to add functionality to your screen layouts. The generated code appears immediately on screen, and you can edit it however you want.
The Rebol App Builder walks you through the development process step-by-step, to help create useful applications of all types.
The apps you create can run immediately on Windows, Mac, Linux, BSD (as well as Solaris, QNX, Amiga, BeOS, and other legacy operating systems), and there is a 90%+ code-compatible version for Android, Raspberry Pi, and other modern platforms.
Using the Rebol App Builder is similar in difficulty to operating visual 'no code' tools such as Scratch, Filemaker Pro, GDevelop, and others, which are meant to introduce children to programming, or to help non-programmers produce point-and-click applications. The Rebol App Builder is extraordinarily easy to understand, compared to writing code in traditional programming languages (Java, C++, Python, Ruby, Basic, Javascipt, etc.). Despite its simplicity, the Rebol App Builder can create a wider range of application types than popular no-code app builders. And instead of taking weeks, months, years, or decades, learning to create everything from graphics to network apps, business tools, games and puzzles, image manipulation apps, music apps, math apps, data processing apps of all sorts, web site apps, and more, can be accomplished within a matter of hours, days, and weeks.
The difference between the Rebol App Builder and other tools is that after you've learned to use the builder, you'll understand how to write actual, productive code in the Rebol programming language. The point of using the builder is to graduate to writing real code in a plain text editor, entirely on your own. The App Builder holds your hand through building basic apps, and along the way, leads you directly to being able to code in a mature, fully capable, general purpose programming language which is a great balance between ease of use, broad capability, and tremendous productivity. (You can read more about how the Rebol App Builder compares to other tools, and what you can do with it, at more-about-rebol-app-builder.html).
The Rebol App Builder is a tiny application which you can download for free, and instantly learn to make 73 app examples within a few hours. The entire uniquely small (500k, half a megabyte) professional Rebol language and development environment is included. There are absolutely no limitations, royalties, or fees needed to use the app builder. It's completely free, and the code of the builder is open source (GPL3).
This tutorial covers everything needed to build all 73 app examples, using a natural learning process which even young children can understand and follow along immediately, without any previous coding experience. It's an intuitive and fun way to learn how to write practical working code, and immediately create your own applications for all types of computers.


2. Getting Started With The Rebol App Builder
2.1 Download
Download the Rebol App Builder for Windows from http://re-bol.com/appbuilder/APPBUILDER.exe. If you're using Mac, Linux, or another operating system, download and install Rebol for your OS from http://www.rebol.com/download-view.html (on Windows, right-click and "Run as Administrator" to install). Then download http://re-bol.com/appbuilder/APPBUILDER.r and click it to run. The entire download/install process takes only a few seconds, even if you're using a very slow Internet connection. If you don't want to install anything, you can just drag the downloaded APPBUILDER.r script onto the downloaded Rebol interpreter and it will run as a totally portable app (Rebol is so ridiculously small and easily portable that all the interpreters for every major operating system, together with all the apps in this tutorial, are small enough to zip up and send as a single email attachment).
2.2 Just Point and Click
Create a user interface (a 'window', 'screen', 'GUI', etc.) for your app by selecting from the displayed widgets (buttons, text fields, drop-down selectors, etc.).
You can also select optional layout words which affect how the widgets are arranged on your user interface screen ('across', 'below', 'at', etc.).
You'll be asked to add ACTIONS ('functions', assignment operations, etc.), which run whenever the user interacts with a widget (clicks on a button, enters text in a field, etc.).
You can add as many actions as you want for each widget (or no actions at all). Click the "Done" button when finished. After adding a new widget, your current fully functional app will run, so that you can test/interact with it.
The generated code of the app appears immediately on screen, and you can edit it however you want.
Close the app when done testing and editing, then repeat the process.
Many actions require a DATA SOURCE (an 'argument', 'parameter', read operation, etc.). For example, if you want to alert (pop-up) some text to the user, the source could be some literal text you type into the code, or the text displayed in a GUI widget, data read from a file, a URL, or the system clipboard, values selected by the user from a pop-up requestor, etc. When adding actions, you have an opportunity to select/edit the data source(s) you want to use.
Be aware that variable words which you can change (to label the data in a way that is recognizable to you), are CAPITALIZED. Edit those labels as needed to refer to GUI fields, file names, variables, etc., in a way that reminds you of what each label represents (i.e., what information will be typed into text entry fields, what items are listed in a drop down box, etc.). You can also edit various properties for each widget you add: size, color, txt, image, etc.
You can save, run, edit, and load your apps using the buttons at the bottom of the screen.
By default, the code of your app is automatically saved to the filename 'r.r', every time you edit, run, or add to it. Just reopen the appbuilder, click the "Load" button, and your most recent r.r app code will be reloaded. You can click the 'Save/Edit' button, then click "Save As", to save the file to a new filename. Click the "Apps" button to load any of the example apps from the App Builder web site, or right-click that same button to load any existing app on your machine's hard drive, thumb drive, etc. You can also copy/paste any code from a web page, or from another editor, into the builder, or open any existing app in the editor, and save it as r.r, if you want it to load automatically.
There are a number of other buttons which provide access to documentation, advanced reference features, downloadable script examples, the full Rebol console, etc.
Those features will be helpful as you progress, but you don't need them to get started.
Here are some links to videos which demonstrate how to build apps with the appbuilder (also describing how some of the app examples in this tutorial work): http://youtu.be/Gxv2pbXVJDo https://youtu.be/dUSNKSQuOEU


3. Example Apps
The primary goal of using the builder is to learn what GUI widgets, actions, and data sources are available in the Rebol language. The builder allows you to point and click pieces of the language, and easily edit the generated code. It keeps you from having to memorize the syntax of the most common language components, but you do have to learn how to use them. The best way to do that is to follow along, by rote, a large set of examples, which are organized to teach you how everything works.
Each of the following apps at http://re-bol.com/appbuilder/ was created with the appbuilder. You can click the 'Apps' button in the appbuilder to load, run, and experiment with each one. That button always provides immediate access to all the most recent apps which are downloadable from the Rebol App Builder web site.
Each app is described in detail, in the next section of this tutorial. Study them in order to progressively learn all the necessary concepts.
Load each individual example into the app builder by clicking on the 'Apps' button, look through the code and then run the app to see how it works. Follow the tutorial explanation of each example, and then re-create each app in the appbuilder by following the tutorial instructions. Make any changes/variations suggested in each tutorial section, to understand how the code of every app can be altered in practical ways. Your goal, when you've done enough example code building with the app builder examples, is to be able to remember the language structure, syntax and meaning of all the available actions and data sources well enough to write code without the help of the app builder. At that point, you'll be able to write code on your own, and you'll be proficient enough to understand how to learn all the other actions (functions), data sources, and features of the Rebol language, using various forms of built in help and available documentation (help is easily accessible directly in the Rebol interpreter, so you're never completely alone in remembering how things work). You can use the app builder as a reference tool once you've learned how to write Rebol code, and/or jump back and forth seamlessly between using the code generator, and writing your own code from scratch, until you're thoroughly proficient.

3.1 my-all-gui-widgets.r
The point of this first example is to demonstrate each of the GUI widgets available in the app builder. You can re-create this code simply by clicking on each of the widgets on the top half of the app builder interface. When asked to select actions, just click the 'cancel' button.
Perhaps the most important thing to learn with this example, is how to format the code you create, so that it's easily readable. The app builder will add the code for each widget you select, all in one long line. Edit the generated code, so that each widget is on a separate line, indented 4 spaces. You'll need to perform this code formatting in every single example generated by the app builder (and whenever you write code on your own). This sort of code formatting is typical in every programming language, not just Rebol.
size 440x490
FIELD1: field 200 "" []
BTN1: btn "Click Me" []
CHECK1: check []
IMAGE1: image %/C/11-6-2015/sync/rebol/heads.jpg []
TXT1: text "TEXT" []
AREA1: area 200x100 ""
return
TXTLST1: text-list 200x100 data ["item1" "item2" "item3"] []
SLIDER1: slider 100x20 []
PROGRESS1: progress 0.1 100x20
ROTARY1: rotary data ["ITEM1" "ITEM2" "ITEM3"] []
DROPDOWN1: drop-down data ["ITEM1" "ITEM2" "ITEM3"] []
BOX1: box 50x50 222.184.135 "TEXT" []
key keycode [#"a"] []
style STYLE1 BOX 50x50 255.0.0 "" []
S1: STYLE1 ""
DRAW1: box 0.0.0 effect [draw [circle 25x25 line 10x90 90x30]]
Once you re-create the code above, save it to a file. Click the 'Save/Edit' button, then click 'Save As' to save the code to any file name you want. Be sure to keep the '.r' extension at the end of the file name. The '.r' ending assures that your code will automatically be executed by the Rebol interpreter. This is useful when you want to distribute your apps for other people to use. All anyone needs to do to run an app you've created, is install Rebol from http://www.rebol.com/download-view.html, download your script, and then click your script to run it (or just drag your script onto the Rebol icon, if they don't want to install Rebol). Remember, Rebol is only about 1/2 megabyte, and it runs the same on every type of computer, so the whole process of installing/running your app on any PC literally takes just a few seconds.

3.2 my-hello-world1--print.r
The classic first program in every language is "Hello World". The first section of this tutorial contains 14 simple hello world apps which demonstrate important basic techniques needed to build apps, such as displaying messages to users, saving information to files, using various GUI widgets, etc.
If you've tried the example above, or otherwise have any code showing in the app builder, select and delete it. Then:
- Click the button widget in the app builder interface
- type "Print Hello" when asked for the button text
- then select 'print source' for the action
- then select "LITERAL" for the source
- Edit the quoted "LITERAL" text in the generated code to "Hello World!".
Also, you can delete the generated 'BTN1:' label in the generated code. It doesn't hurt to leave that 'BTN1:' label in the code, but it's not needed in this example, because we're not referring to that button anywhere else in the app.
Notice that the print action is placed inside square brackets in the code, directly after the button. In all code generated by the App Builder, actions will always be grouped within square brackets like that.
btn "Print Hello" [print "Hello World!"]


3.3 my-hello-world2--alert.r
This example creates a pop-up alert with the words "HELLO WORLD!".
Create a new app by erasing any code displayed in the app builder, then:
- Click the button widget
- type "Say Hello" when asked for the button text
- select 'alert form source' for the action
- select "LITERAL" for the source
- Edit the quoted "LITERAL" text in the generated code to "Hello World!" (and delete the unnecessary 'BTN1:' label, if you want).
Note that the word 'form' converts any of the various data type values available in Rebol to quoted text. You'll need to use 'form' together with the 'alert' action, whenever you want to display dates, times, colors, and other types of values, so the builder automatically puts it in the code, whether you need it or not. You could delete the 'form' word here, since the value we're alerting is a literal quoted string of characters, but it doesn't hurt to leave it.
btn "Say Hello" [alert form "HELLO WORLD!"]


3.4 my-hello-world3--alert-value.r
The word 'value' refers to the most obvious/useful/prominent piece of data displayed on a widget. In the case of a button, the word 'value' refers to the text displayed on the face of the button.
To create this example:
- Click the button widget
- type "Hello World!" when asked for the button text
- select 'alert form source' for the action
- select 'value' for the source.
btn "Hello World!" [alert form value]

3.5 my-hello-world3b--alert-field-value.r
This example is similar to the one above, except that it alerts any text displayed in the field widget (which we set by default to "Hello World" in this code). Note that the word 'value' here refers to the text currently displayed in the field widget.
- Click the field widget
- select 'alert form source' for the action
- select 'value' for the source.
Try running this app and typing some different text into the field widget. You can delete the "FIELD1:" label if you want. It's only needed if we're going to refer to that field widget elsewhere in code.
FIELD1: field 200 "Hello World!" [alert form value]

3.6 my-hello-world4--set-face-field.r
This example demonstrates how to set the contents of a field widget.
Using the builder:
- Add a field widget
- cancel adding any actions for it
- Add a button widget
- type "Display Hello in Field" when asked for the button text
- select 'set-face FIELD1 source' as the action
- select "LITERAL" as the data source
- Edit the word "LITERAL" in the generated code to "Hello World!".
You can delete the automatically generated quotes and square brackets, because we're not going to give the field any default text to display, or any actions (it doesn't hurt to leave the empty brackets and quotes if you want, it just helps to visually clean up the code a bit).
Notice how the button's action code, between the square brackets, has also been edited here so that the action is on a separate indented line. This helps keep lines of code short and more readable. You can add 'white space' such as new lines, spaces, and tabs, anywhere you want in Rebol code.
FIELD1: field 200
btn "Display Hello in Field" [
    set-face FIELD1 "Hello World!"
]


3.7 my-display-time.r
This example is like the one above, except the source has been changed from literal text to the word 'now', which returns the current date and time in Rebol. Every time you click the button, the field will be updated to display the current date/time. It's important to realize that data sources ('arguments') used by actions ('functions') in Rebol, can be functions themselves (i.e., 'now' is a function built into Rebol, which returns a data value. That current value is used as the data source for the alert action here).
To re-create this app:
- Add a field widget
- cancel adding any actions
- Add a button widget
- type "Display Time" as the button text
- select 'set-face FIELD1 source' as the action
- select 'now' as the source
- (clean up the unnecessary BTN1: label, and the empty quotes and brackets, if you want).
FIELD1: field
btn "Display Time" [set-face FIELD1 now]


3.8 my-cam-video.r
This example is similar to the previous two, except we'll add an image widget instead of a field widget, and we'll update that widget with live images taken from a camera source on the Internet.
To re-create this app:
- Add an image widget (it looks like the 'REBOL' icon)
- cancel selecting any file
- select 'set-face FIELD1 source' as the action
- select 'load target' as the data source
- select 'http://URL.com/FILE' as the target.
'FIELD1' is the default placeholder used in code generated by the app builder, to refer to some labeled widget. Whenever you see 'FIELD1', you'll edit it to refer to some (other) widget in your app's screen layout. Edit 'FIELD1' in this generated code to 'image1', to refer to the image widget we've added (it doesn't matter if the label is capitalized or not).
'http://URL.com/FILE' is the default placeholder used to refer to some URL target (web address) from which data will be downloaded. Edit 'http://URL.com/FILE' in the generated code of this app to 'http://207.251.86.238/cctv5.jpg' (or to any other jpg cam URL you want - there are many more camera URLs available at https://www.cctvview.info/Cameras, if you feel like playing with the app).
Try clicking on the image repeatedly, and you'll see a live video feed from the camera.
IMAGE1: image "" 320x240 [
    set-face image1 load http://207.251.86.238/cctv5.jpg
]
Hopefully, it's becoming clear how the app builder works in general. The builder walks you through selecting pieces of the language (GUI widgets, actions, data sources, file targets, etc.), and you need to edit the default placeholder values in the generated code to refer to actual labels, files, URLs, sizes, and other properties that you want to use in your app. It's really simple to do once you get used to the routine, and you'll get comfortable with the process quickly by repeatedly doing the same sorts of things throughout all the following example apps.

3.9 my-hello-world5--write.r
This example writes the text "Hello World!" to a file when the button is clicked.
To re-create this app:
- Add a button widget
- type "Write Hello to File" as the button text
- select 'write target source' as the action
- select "LITERAL" as the source
- select %FILE as the target
- Edit the default '%FILE' placeholder to '%hello.txt' (or any other file name you want) in the generated code. Edit "LITERAL" to "Hello World!" (or any other text you want).
btn "Write Hello to File" [write %hello.txt "Hello World!"]

3.10 my-hello-world6--alert-variable-word.r
In Rebol, the colon symbol is used to assign a word to any value (data, actions, etc.). In this example, the word VAR is used as a 'variable' word label to represent the text "Hello World!". We'll use variables constantly when creating apps of all types.
- Add a button widget
- type "Alert Variable Word" as the button text
- select 'VAR: source' as the action
- select "LITERAL" as the source.
- Add another action (before clicking cancel)
- select 'alert form source' as the action
- then VAR as the source
- You can edit the VAR placeholder word to anything you want (or leave it as is).
btn "Alert Variable Word" [
    VAR: "Hello World!"
    alert form VAR
]

3.11 my-hello-world7--text-list.r
This example demonstrates that the word 'value' refers to the selected item, when used in a text list.
- Add a text-list widget
- Type "Hello" the first time when asked to add a new line to the text list. Type "World" the second time, then cancel adding any more lines to the text list.
- 'alert form value' action
- 'value' source.
- You can edit the generated ["Hello" "World"] text-list data block code, if you want. You could have also simply canceled adding any items in the first step, and just manually edited or copy/pasted the line items.
In the code below, the default generated 'TXTLST1:' label has been removed, since we're not going to refer to this widget anywhere else in the example (but again, it doesn't hurt to leave it - it just helps to clean up your code, when you can remove any unused labels, empty text quotes, empty square bracket action blocks, etc.).
text-list 200x100 data ["Hello" "World"] [alert form value]


3.12 my-browse-favorites.r
This example demonstrates the text-list widget again, along with the 'browse' action.
- Add a text-list widget
- add "rebol.com" as a line in the text list, then cancel adding more lines
- select 'browse to-url source' as action
- select 'value' as source
- Edit the data block of the text-list to hold any web site URLs you want.
text-list 200x100 data ["rebol.com" "yahoo.com" "reddit.com"] [
    browse to-url value
]


3.13 my-hello-world8--drop-down.r
This example shows how to use the 'size' layout word.
- Select the 'size' word, in the same way you select any widget. Edit the default size value to any numbers you want (the numbers represent pixels across from the left, and down from the top left corner of the app's screen layout).
- Add a drop down widget and edit the generated code in the same way as the text list example above.
Notice that the default "DROPDOWN1" label has been removed here, since it's not needed:
size 500x300
drop-down data ["Hello" "World"] [alert form value]

3.14 my-hello-world9--get-face-drop-down.r
In this example, the "DROPDOWN1" label has been left in place, but the default action block has been removed, since we don't want the drop-down widget to do anything when it's clicked. Instead, a separate button has been added, which refers to the item selected in the drop-down selector.
To recreate this example:
- add a drop-down widget
- click cancel for the action
- add a button widget
- type "Alert Selected" as the button text
- 'alert form source'
- 'copy get-face FIELD1'
- Edit 'FIELD1' to 'DROPDOWN1'
size 500x300
DROPDOWN1: drop-down data ["Hello" "World"]
btn "Alert Selected" [alert form copy get-face DROPDOWN1]

3.15 my-hello-world10--attempt-get-face-drop-down.r
You may notice that when using the example above, if you click the button before selecting an item in the drop-down, you'll get an error (the 'copy' function has nothing to copy if nothing is selected). The error completely stops the app from running. To handle that situation, in this example we'll add an 'attempt' action. The attempt function is meant to try and run any number of actions, and it will keep the program from stopping if any of those actions ever produces an error.
To re-create this app:
- add a drop-down widget, with no actions
- add a button widget
- type "Alert Selected" as the button text
- choose 'attempt ACT/F1' as the action
- alert form source as the 'Inner Action'
- 'copy get-face FIELD1' as the source for that inner action
- then cancel to finish the inner actions
- then cancel to finish the button actions.
Notice in the generated code that the attempt action is enclosed inside the square brackets which surround the button actions. You should get used to editing long or multiple actions like this, so that they're indented on separate lines. Indentation really helps to visually group actions and items so that they're more easily discernable as individual, but related, lines inside a block. Notice that the 'Inner Actions' of the attempt function are also enclosed inside square brackets following the word 'attempt' (if there were more actions there, it would be a good idea to put them all on separate lines, and indent them). You'll see this sort of 'inner actions' organization in many language structures (square bracketed blocks of code, inside other square bracketed blocks of code). Remember, the builder does this inner action grouping for you, but your end goal is to learn the notation, so that you can eventually write code without the help of the builder. At this point, learning to indent the generated code properly should be your primary goal.
size 500x300
DROPDOWN1: drop-down data ["Hello" "World"]
btn "Alert Selected" [
    attempt [alert form copy get-face DROPDOWN1]
]
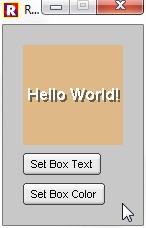
3.16 my-hello-world11--set-box-properties.r
This example demonstrates the box widget. You can edit the default generated text, size, label, and color, as well as other properties. The color is an RGB (Red.Green.Blue) value. Each number in an RGB value can range from 0 to 255 (0.0.0 is black, 255.255.255 is white, 255.0.0 is the strongest red, 0.255.0 is the strongest green, etc.). Try editing the RGB value in this code to see how changing each number creates a different mix of colors. You can alternately type a color word such as white, purple, etc., instead of RGB values. Click the 'Ref' button at the bottom of the builder screen to see a display of all the color words built into Rebol.
To re-create this example:
- Add a box widget
- choose 'alert form source' as the action
- 'value' as the source.
- Add a button widget
- type "Set Box Text" as the button text
- choose 'FIELD1/PROPERTY: source' as the action
- choose 'request-text/title/default "TITLE:"' as the source
- Add another button widget
- type "Set Box Color" as the button text
- choose 'FIELD1/PROPERTY: source' as the action
- choose request-color as the source
- Edit the generated 'FIELD1/PROPERTY' code to 'box1/text' in the first button and 'box1/color' in the second button, edit '"TITLE:" "DEFAULT TEXT"' to '"New Text:" ""', and edit 'show FIELD1' to 'show box1'.
BOX1: box 100x100 222.184.135 "Hello World!" [
    alert form value
]
btn "Set Box Text" [
    box1/text: request-text/title/default "New Text:" "" show box1
]
btn "Set Box Color" [
    box1/color: request-color show box1
]
The first button in this example sets the text displayed on the box to some text which is requested from the user. The 'request-text' action ('function') is built into Rebol. It creates a pop-up window which asks the user to type in some text. The /title and /default refinements allow you to specify title and default text displayed in the pop-up window. Whenever a visual property of any widget is changed, the 'show' action must be used to update the screen display. Notice the 'show box1' code in the example above. The second button in this example changes the color of box1 to a color selected by the user.


3.17 my-hello-world12--rejoin.r
This example demonstrates how to join text (and other types of data) together using the 'rejoin' function. It also demonstrates how to use the 'Do' layout word.
To re-create this example:
- Add a 'Do' layout word (just like adding a widget)
- select 'print source' as the action
- select "LITERAL" as the source
- Edit "LITERAL" to "". This print operation simply opens a console screen before the app window appears, so that the app window isn't later covered up by the console, when the program prints some text. We'll use 'Do' blocks in future programs to do actions automatically, which don't require user interaction with a GUI widget.
- Add another button widget
- type "Rejoin 2 Pieces of Text" as the button text
- choose 'VAR: source' as the action
- "LITERAL" as the source
- choose 'VAR: source' as the next action
- "LITERAL" as the source for that action
- 'VAR: source' as a third action
- 'rejoin [VAR VAR2]' as the source for that action
- 'print source' as a fourth action
- 'VAR' as the source for that action
- cancel adding any more actions and edit the "LITERAL" strings to "Hello " and "World!", edit the 2nd and 3rd VARs to VAR2 and VAR3. You could change the variable labels to any word you want, and the literal strings of text to anything you want (those variable words could even represent entire web sites or books full of text...).
- Add another button widget
- type "Rejoin to Literal Pieces of Text" as the button text
- 'print source' as the action
- 'rejoin [VAR VAR2]' as the source
- cancel adding actions and edit the rejoined [VAR VAR2] to be literal strings of text ["Hello " "World!"].
- Add another button widget
- type "Rejoin Text and Time" as the button text
- 'print source' as the action
- 'rejoin [VAR VAR2]' as the source
- Edit the first rejoined VAR to be the literal string of text "It's now: " and VAR2 to be 'now'.
do [print ""]
btn "Rejoin 2 Pieces of Text" [
    VAR: "Hello "
    VAR2: "World!"
    VAR3: rejoin [VAR VAR2]
    print VAR3
]
btn "Rejoin 2 Literal Pieces of Text" [
    print rejoin ["Hello " "World!"]
]
btn "Rejoin Text and Time" [
    print rejoin ["It's now: " now]
]


3.18 my-slider.r
This example demonstrates how to use the slider widget.
- Add a 'Do' word to the layout
- 'print source' action
- "LITERAL" source
- Edit "LITERAL" to ""
- Add a slider widget
- 'print source' action
- 'value' source
When the user interacts with the slider widget, it prints a value which represents the current position of the slider (a fraction of 1, depending on where the slider is positioned). This example is oddly satisfying to watch and play with.
do [print ""]
slider 100x20 [print value]


3.19 my-slider2.r
This example demonstrates how to use a progress bar widget, along with a slider widget.
- Add a progress bar widget without any actions
- Add a slider widget
- 'set-face FIELD1' action
- 'value' source
- Edit 'FIELD1' to 'PROGRESS1'
- Add a button widget
- type "Set Progress" as the button text
- 'VAR: source' action
- 'request-text/title/default' source
- 'VAR: source' next action
- 'to-TYPE VAR' source
- 'set-face FIELD1 source' next action
- 'VAR' source
- Cancel adding actions and edit 'to-TYPE' to 'to-decimal', and edit 'FIELD1' to 'PROGRESS1'.
Any time you need to convert quoted text to a computable number or some other value upon which evaluations can be performed (date, times, RGB color values, etc.), you'll need to use 'to-TYPE' conversions. You'll see many examples of these type conversions throughout the following example apps in the tutorial. They're one of the powerful features of Rebol.
PROGRESS1: progress 0.1 100x20
slider 100x20 [set-face PROGRESS1 value]
btn "Set Progress" [
    VAR: request-text/title/default "Value:" ".5"
    VAR: to-decimal VAR
    set-face PROGRESS1 VAR
]


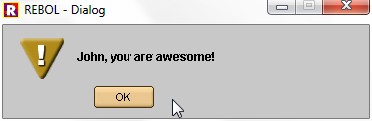
3.20 my-compliment-maker.r
This example demonstrates a text widget, and how to rejoin text from a field widget with other static text.
- Add a text widget with no line items and no actions
- Add a field widget with the following 3 actions and data sources
- VAR: source
- get-face FIELD1
- VAR: source
- rejoin [VAR VAR2]
- alert form source
- VAR
- Cancel adding actions and edit the second VAR word to VAR2, or any other word you want.
text "Type your name and press [ENTER]:"
FIELD1: field 200 "" [
    VAR: copy get-face FIELD1
    VAR2: rejoin [VAR ", you are awesome!"]
    alert form VAR2
]

3.21 my-notepad.r
This example demonstrates the area widget, as well as how to use the 'read %FILE' data source and the 'write' action.
- Add a new area widget and edit the size value to 500x300
- Add a button widget
- type "Save" as the button text
- write target source
- copy get-face FIELD1
- %FILE
- alert form source
- "LITERAL"
- Edit 'FIELD1' to 'area1', edit "LITERAL" to "Saved", and edit '%FILE' to any file name you want.
- Add another button widget
- type "Load" as the button text
- set-face FIELD1 source
- read target
- %FILE
- Edit 'FIELD1' to 'area1'
Notice in the final code below that the button labels have been removed, and the 'form' word has been removed from the alert action, because they're not needed (but it doesn't hurt to leave any of those things in the code).
AREA1: area 500x300
btn "Save" [
    write %FILE copy get-face area1
    alert "Saved"
]
btn "Load" [
    set-face area1 read %FILE
]


3.22 my-web-page-editor.r
This example demonstrates the 'across' layout word and the ftp:// data source/target. By default, widgets are placed consecutively below one another as they're added to a layout. You can change that default behavior with the 'across' layout word. After adding the 'across layout word, every widget is placed consecutively across the screen (the word 'return' is used to start on a new line below, like a carriage return). The rest of this example is the same as the notepad example above, except that the ftp:// source has been selected as the data source/target. The final result is that this app allows you to edit any web page (you must type in username and password credentials to an FTP server account for this to work).
AREA1: area 500x300
across
btn "Save" [
    write ftp://USER:PW@URL/FILE get-face area1
    alert "Saved"
]
btn "Load" [
    set-face area1 read ftp://USER:PW@URL/FILE
]

3.23 my-add-2-fields.r
This example demonstrates the '(CALCULATION)' data source.
- Add 2 fields without actions
- Add a button widget
- type "Add" as the button text
- alert form source
- (CALCULATION). Use the calculation wizard to select '(to-DECIMAL copy FIELD1/text) + (to-DECIMAL copy FIELD1/text)' as the components of the calculation. Edit the second default 'FIELD1/text' to 'FIELD2/text'.
FIELD1: field
FIELD2: field
btn "Add" [
    alert form
      (to-DECIMAL copy FIELD1/text) +
      (to-DECIMAL copy FIELD2/text)
]


3.24 my-stopwatch.r
This is another example which demonstrates the (CALCULATION) data source, as well as the now/time data source.
- Add a button widget
- type "Start" as the button text
- VAR: source
- now/time
- Add another button widget
- type "Stop" as the button text
- VAR: source
- now/time
- alert form source
- (CALCULATION). Use the calculation wizard to choose 'VAR - VAR' as the calculation components, then edit the default 'VAR' values to 'VAR2' where needed (as shown in the final code below).
Again, 'VAR' and 'VAR2' could be replaced by any variable word(s) you choose throughout your code.
btn "Start" [VAR: now/time]
btn "Stop" [
    VAR2: now/time
    alert form (VAR2 - VAR)
]


3.25 my-sliding-tile-game.r
This example demonstrates how to use the 'style' layout word. Styles are a powerful feature that allow you to create a new type of widget based upon a previously existing widget.
- Add a 'NewStyle" word to your layout. For the actions of the new widget style, choose the following:
- VAR: source
- FIELD1/offset
- FIELD1/offset: FIELD1/offset + 5x5
- FIELD1/PROPERTY: source show FIELD1
- VAR
- Edit the first 'FIELD1/offset' to 'face/offset', edit 'FIELD1/offset + 5x5' to 'box1/offset', and edit the second 'FIELD1/PROPERT' to 'box1/offset'. In this case, we'll label the new widget 'S1'. The S1 widget will be a red box which performs the actions that were specified above. Now we can add as many of those S1 widgets as we want, and they'll all perform the same way.
- To finish the app, click the 'across' layout word, add three 'style' widgets, add a 'return' layout word, add three more 'style' widgets and a 'return' layout word, add two more 'style' widgets, and then add a box widget.
You can clean up the generated code by removing the label words, as in the final code below, but it's not necessary.
Click any numbered box, and it will switch places with the empty box. The point of the game is to rearrange all the boxes in order from 1 to 8.
style S1 BOX 255.0.0 [
    VAR: face/offset
    face/offset: box1/offset
    box1/offset: VAR
]
across
S1 "8" S1 "7" S1 "6" return
S1 "5" S1 "4" S1 "3" return
S1 "2" S1 "1" BOX1: box 100x100

3.26 my-clipboard-grabber-saver.r
This example demonstrates how to retrieve, edit, and save any items which have been copied to the system clipboard from other apps (a later example will demonstate how to constantly save a stream of all items copied to a clipboard, to a file).
- Add an area widget with no actions. Edit the default size to 400x300.
- Add a button widget
- type "Get Clipboard" as the button text
- set-face FIELD1 source
- read target
- clipboard://
- Edit 'FIELD1' to 'area1'. This sets the text displayed in the area1 widget to whatever is read from the system clipboard.
- Add a button widget
- type "Save" as the button text
- write/append target source
- %FILE
- get-face FIELD1
- alert form source
- "LITERAL"
- Edit 'FIELD1' to 'area1', edit "LITERAL" to "Saved" (and edit %FILE to any other file name, if you want).
The write/append action writes to the end of a file, without deleting any of the previously existing contents of the file. This creates an on-going log type of file which continually adds each new piece of data to the existing collection of data. We'll use write/append in many different types of apps which save collections of information.
AREA1: area 400x300 ""
btn "Get Clipboard" [
    set-face area1 read clipboard://
]
btn "Save" [
    write/append %FILE get-face area1
    alert "Saved"
]

3.27 my-days-between.r
This example demonstates how to use the 'request-date' requestor, how to perform date calculations, as well as how to set the text property of a button.
- Add a button widget
- type "Start" as the button text
- VAR: source
- request-date
- FIELD1/PROPERTY: source show FIELD1
- VAR. Edit 'FIELD1/PROPERTY:' to 'btn1/text', edit 'FIELD1' to 'btn1', and edit the size of the button to 200
- Add a button widget
- type "End" as the button text
- VAR: source
- request-date
- FIELD1/PROPERTY: source show FIELD1
- VAR
- set-face FIELD1 source
- (CALCULATION) In the calcuation editor, select 'VAR - VAR'. Edit the first VAR in the calculation to VAR2, edit 'FIELD1/PROPERTY:' to 'btn2/text', edit 'FIELD1' to 'btn2', and edit the size of the button to 200.
- Add a text widget without any actions, and edit the default "TEXT" to "Days Between"
- Add a field widget without any actions
(you can erase any unnecessary empty quotes, empty square action brackets, etc., if you want to clean the code as much as possible).
BTN1: btn 200 "Start" [
    VAR: request-date
    btn1/text: VAR show btn1
]
BTN2: btn 200 "End" [
    VAR2: request-date
    btn2/text: VAR2
    set-face FIELD1 (VAR2 - VAR)
]
text "Days Between"
FIELD1: field 200
It this code, 'btn1/text' is used to refer to the text found on the widget labeled 'btn1'. This is slightly more versatile that the 'get-face' and 'set-face' actions you've seen so far, because we can refer to any property of any widget (size, location, font, color, stored data, edge and paragraph properties, etc.). We can additionally use this syntax to set any property of any widget. Click the 'Ref' button at the bottom of the app builder screen, and then click any widget style name, and you'll find help which shows all the properties of all the widgets available in Rebol.


3.28 my-tip-calculator.r
This example is another calculation demonstration.
- Add a field widget with no actions, and edit the dafault displayed text to "50.00"
- Add another field widget, edit its default text to ".20", and edit its label to 'FIELD2'.
- Add a button widget
- type "Calculate Total with Tip" as the button text
- set-face FIELD1 source
- (CALCULATION) Use the calculation wizard to select '(to-DECIMAL copy FIELD1/text) * (to-DECIMAL copy FIELD1/text) + (to-DECIMAL copy FIELD1/text)'.
- Add a field widget without any actions
Edit all the field labels and references, as shown in the final code below.
FIELD1: field 200 "50.00"
FIELD2: field 200 ".20"
BTN1: btn "Calculate Total with Tip" [
    set-face FIELD3 (
        (to-DECIMAL copy FIELD1/text)
        * (to-DECIMAL copy FIELD2/text)
        + (to-DECIMAL copy FIELD1/text)
    )
]
FIELD3: field 200 ""

3.29 my-block-demonstration.r
This example demonstrates the very important topic of how to work with lists of data. In Rebol, lists are called 'blocks' or 'series'.
- Add an 'across' layout word, so that all the following widgets are added across the app display.
- Add a 'Do' layout word
- VAR: source
- copy []. This creates a new empty block labeled VAR.
- Add a field widget
- append blk source
- copy get-face FIELD1
- VAR. This adds whatever text is typed into the field widget, to the block.
- Add a button widget
- type "Display" as the button text
- set-face FIELD1 source
- request-list "TITLE:" source
- VAR
- (You can edit the "TITLE:" text of the request-list to "Items:", if you want). This sets the text of the field widget to whichever item the user selects from the request-list operation (notice that the request-list displays the items currently in the VAR block).
- Add another button widget
- type "Delete" as the button text
- remove/part find blk source NUM
- find VAR request-list "TITLE:"
- VAR
- Edit NUM to 1. This will remove 1 item from the block, which matches the item selected by the user from the request-list. Edit "Title:" to "Items:".
- Add another button widget
- type "Save" as the button text
- save source target
- VAR
- %FILE
- alert form value
- "LITERAL"
- Edit "LITERAL" to "Saved". This will save the block to a file, and alert the user when the save operation is complete.
- Add another button widget
- type "Load" as the button text
- VAR: source
- load target
- %FILE. This will load the block from a saved file.
Very carefully inspect and try to understand the syntax of the generated code in these actions. You'll use them often when building apps. Try building an app that adds all the values from 3 text fields every time a 'Submit' button is pressed, and removes 3 found items every time a 'Delete' button is pressed (there is such an app later in these examples).
across
do [
    VAR: copy []
]
FIELD1: field 200 [
    append VAR copy get-face FIELD1
]
btn "Display" [
    set-face FIELD1 request-list "Items:" VAR
]
btn "Delete" [
    remove/part find VAR request-list "Items:" 1
]
BTN1: btn "Save" [
    save %FILE VAR
    alert "Saved"
]
BTN1: btn "Load" [
    VAR: load %FILE
]


3.30 my-image-effects.r
This example demonstrates how to apply effects to an image loaded from a file. The effects are chosen from the block of items displayed in a text-list widget.
- Add an image widget (the 'REBOL' icon)
- cancel selecting an image file and cancel adding any actions
- Add a text-list widget
- type in the quoted effect texts listed in the example below (or just paste them into the generated code later)
- FIELD1/PROPERTY: to-TYPE value show FIELD1.
- Edit 'FIELD1/PROPERTY' to 'image1/effect'. Edit 'to-TYPE' to 'to-block'. Edit 'show FIELD1' to 'show image1'.
When the user selects an item from the text-list, the effect property of the image is changed to the selected value.
IMAGE1: image %/C/3-29-2016/sync/rebol/heads.jpg
TEXTLIST1: text-list 200x100 data [
    "Invert" "grayscale" "emboss" "blur" "flip 180"
    "rotate 90" "tint 83" "Contrast 66" "luma 150" "none"
] [
    image1/effect: to-block value show image1
]

3.31 my-todo.r
This example demonstrates how to add and remove items to/from the data block of a text-list widget.
- Add a text-list widget
- remove/part find blk source NUM
- copy TXTLST1/data
- value.
- Edit NUM to 1 and delete the word 'copy'. This removes 1 item which matches the value chosen by the user, from the text-list's data block (this enables the user to delete any selected item from the text-list display). Note that we erased the word 'copy' here in the code, because we want to remove the selected item from the actual text-list data block, as opposed to removing the item from a copy of that data block.
- Add a field widget
- append TXTLST1/data copy FIELD1/text show TXTLST1. This adds the text in the FIELD1 widget to the data block of the text-list widget.
- Add a button widget
- type "Save" as the button text
- save target blk
- %FILE
- copy TXTLST1/data. This saves the text-list data block to a file (you can edit the file name if you want).
- Add a button widget
- type "Load" as the button text
- FIELD1/PROPERTY: source show FIELD1
- load target
- %FILE.
- Edit "FIELD1/PROPERTY:" to 'txtlist1/data'. Edit 'FIELD1' to 'txtlist1'. This loads the data from the file to the data block of the text-list widget.
This is a fully functional to-do list app, with add, remove, save, and load features. This is the most basic form of a 'CRUD' (Create Read Update Delete) app. CRUD apps are often simple to create, but they can be some of the most important types of programs used in 'real world' business environments. To help businesses run, it's often necessary to have a variety of apps which save, retrieve, and organize information that is important to managing operational activities, handling inventory items, scheduled events, payroll data, and information about people and processes which make the business function. Learning to write this kind of code is one of the most valuable and important goals in computing.
TXTLST1: text-list 200x100 data [] [
    remove/part find TXTLST1/data value 1
]
FIELD1: field 200 "" [
    append TXTLST1/data copy FIELD1/text show TXTLST1
]
btn "Save" [save %FILE copy TXTLST1/data]
btn "Load" [txtlst1/data: load %FILE show txtlst1]

3.32 my-random-values.r
This example demonstrates how to generate random data values.
- Add a 'Do' word to the layout
- print source
- "LITERAL"
- Edit "LITERAL" to "".
- Add a button widget
- type "Print Random 0 - 100" as the button text
- print source
- 0 + random 100. This prints a random number from 1 to 100. You can delete the "0 +", but it's not necessary. You'll notice that the app builder automatically adds 'random/seed now' to the do block at the beginning of the app code. This bit of code is required by default any time you want to generate random values.
- Add a button widget
- type "Print Random 50 - 100" as the button text
- print source
- 0 + random 100
- Edit '0 + random 100' to '50 + random 50'. This prints a random value from 50 to 100.
- Add a button widget
- type "Print Random Letters" as the button text
- print source
- 0 + random 100. Edit '0 + random 100' to 'random "abcdefghijklmnopqrstuvwxyz"'. This prints a random arrangement of the letters of the alphabet.
- Add a button widget
- type "Print Random Color" as the button text
- print source
- 0 + random 100.
- Edit '0 + random 100' to 'random 255.255.255'. This prints a random RGB color value (notice that each segment of the random generated color value is limited to 255).
- Add a button widget
- type "Print Random Item From List" as the button text
- print source
- first random blk
- copy ["ITEM1" "ITEM2"]. This prints the first item from a random arrangement of items in the block (you can edit the items in the block if you want).
do [
    random/seed now
    print ""
]
btn "Print Random 0-100" [print 0 + random 100]
btn "Print Random 50-100" [print 50 + random 50]
btn "Print Random Letters" [
    print random "abcdefghijklmnopqrstuvwxyz"
]
btn "Print Random Color" [print random 255.255.255]
btn "Print Random Item From List" [
    print first random copy ["ITEM1" "ITEM2"]
]


3.33 my-coin-flip.r
This example alerts the user with a random "Heads" or "Tails" word every time the button is clicked.
- Add a button widget
- type "Flip" as the button text
- alert form source
- first random blk
- copy ["ITEM1" "ITEM2"]
- Edit ["ITEM1" "ITEM2"] to ["Heads" "Tails"]
Notice that the 'do [random/seed now]' line is added automatically to seed the random value generator.
do [random/seed now]
btn "Flip" [
    alert form first random copy ["Heads" "Tails"]
]


3.34 my-coin-flip--with-images.r
This example builds on the previous example, but actually displays a random heads or tails image of a coin.
- Add a box widget
- set-face FIELD1 source
- first random blk
- copy ["ITEM1" "ITEM2"]
- Edit 'FIELD1' to 'box1', edit ["ITEM1" "ITEM2"] to [http://re-bol.com/heads.jpg http://re-bol.com/tails.jpg], and add the word 'load' as shown in the code below.
The 'load' function retrieves the image data at the randomly chosen URL (downloads the file and properly interprets the internal image data for use in Rebol). The set-face action sets the box image to that loaded image data.
do [random/seed now]
BOX1: box 150x150 255.0.0 "" [
    set-face box1 load first random copy [
        http://re-bol.com/heads.jpg http://re-bol.com/tails.jpg
    ]
]

3.35 my-math-quiz.r
This example demonstrates math evaluations using randomly generated numbers displayed in text fields.
- Add a field widget, text widget, field widget, and text widget, all without actions
- Edit the text of the first text widget from "TEXT" to " +", and add 'font-size 30' to its properties in the generated code. Edit the default "TEXT" of the second text widget to "". Edit the second 'FIELD1' label to 'FIELD2'.
- Add a button widget
- type "New Example" as the button text
- set-face FIELD1 source
- 0 + random 100
- set-face FIELD1 source
- 0 + random 100
- Edit the second FIELD1 to FIELD2.
- Add a button widget
- type "Show Answer" as the button text
- alert form source
- (CALCULATION). Use the calculation wizard to select (to-DECIMAL copy FIELD1/text) + (to-DECIMAL copy FIELD1/text) as the components of the calculation. Edit the second default 'FIELD1/text' to 'FIELD2/text'.
You could also edit the default generated random numbers to any range you want.
do [random/seed now]
FIELD1: field 200 ""
text font-size 30 " +"
FIELD2: field 200 ""
text ""
btn "New Example" [
    set-face FIELD1 0 + random 100
    set-face FIELD2 0 + random 100
]
btn "Show Answer" [
    alert form (
        (to-DECIMAL copy FIELD1/text)
        + (to-DECIMAL copy FIELD2/text)
    )
]

3.36 my-math-quiz2.r
This example is mostly like the previous, except that the first text widget is replaced with a rotary widget. Edit the data block of the rotary widget to [" + " " - " " * " " / "].
- When adding the second button:
- VAR: source
- rejoin [get-face FIELD1 get-face FIELD2]
- alert form source
- VAR
- Edit the rejoin to include 'get-face rotary1', as shown in the final code below. This allows you to select the type of math operation to be quized upon.
(You can add more operations inside the rotary data block, if you want).
do [random/seed now]
FIELD1: field 200 ""
ROTARY1: rotary data [" + " " - " " * " " / "] []
FIELD2: field 200 ""
text ""
btn "New Example" [
    set-face FIELD1 0 + random 100
    set-face FIELD2 0 + random 100
]
btn "Show Answer" [
    VAR: do rejoin [get-face FIELD1 get-face rotary1 get-face FIELD2]
    alert form VAR
]

3.37 my-move-button-randomly.r
This example demonstrates how to change the position of a widget in the screen layout, to a random coordinate location.
- Add a size word, and edit the size value to 400x400.
- Add a button widget
- type "asdf" as the button text
- FIELD1/PROPERTY: source show FIELD1
- random 0 + 100
- Edit '0 + 100' to 'random 300x380', edit 'FIELD1/PROPERTY:' to 'btn1/offset', edit 'show FIELD1' to 'show btn1'.
Whenever you click the button, it will move to a new random position within the screen.
do [random/seed now]
size 400x400
BTN1: btn "adsf" [
    btn1/offset: random 300x380 show btn1
]


3.38 my-compliment-generator.r
This example introduces the 'parse' action. Parse is an extremely powerful feature of Rebol, used to split strings of text, perform complicated text search and match operations, validate text input, and it's even the basis of Rebol's amazing dialecting capabilities (the ability to create powerful little domain-specific languages) ... but you don't need to worry about any of that right now.
In this example, we'll use 'parse' to split up the text in an area widget, into a list (block) of separate words.
- Add two area widgets, edit the default displayed text as shown in the code below.
- Add a button widget
- type "Compliment" as the button text
- VAR: source
- parse VAR ","
- VAR: source
- first random blk >
- load VAR
- VAR: source
- parse VAR ","
- VAR: source
- first random blk
- load VAR
- alert form source
- rejoin [VAR VAR2]
- Edit each instance of ", " to " ", and edit 'parse VAR' to 'parse area1/text' and 'parse area2/text', as shown in the final code below (this splits the displayed text in the area widgets at the blank spaces). Edit the other placeholder VAR labels to VAR2, VAR3, and VAR4, as shown in the code below. Edit 'rejoin [VAR VAR2]' to 'rejoin ["You're a " VAR2 " " VAR4 "!"]'. Edit the size of the areas from 200 to 300 across.
do [random/seed now]
AREA1: area 300x100 "brilliant rare unique talented exceptional"
AREA2: area 300x100 "genius champion winner success achiever"
BTN1: btn "Compliment" [
    VAR: parse area1/text " "
    VAR2: first random load VAR
    VAR3: parse area2/text " "
    VAR4: first random load VAR3
    alert form rejoin ["You're a " VAR2 " " VAR4 "!"]
]


3.39 my-parse-IP-address.r
This example uses several parse syntaxes to extract some delineated data from a downloaded web page (interestingly, that page itself is generated from another Rebol script running on a web server).
- Add a button widget
- type "Get IP Address" as the button text
- parse source [any [thru "START" copy VAR to "END" (append BLOCKNAME: [] VAR)] to end]
- read target
- http://URL.com/FILE
- VAR: source
- parse VAR ","
- set-face FIELD1 source
- last blk
- VAR
- Edit 'http://URL.com/FILE' to 'http://guitarz.org/ip.cgi'. Edit "START" to
and "END" to . Edit 'VAR2: parse blockname ","' to 'VAR2: parse blockname ""' and edit 'last VAR' to 'last VAR2'.You can visit http://guitarz.org/ip.cgi and 'view source' in your web browser, to see the web page document which this app is parsing. The first thing that happens is we use parse to get the data between the title tags, then we use parse to split up that extracted text, and then we display the last item in that split list.
FIELD1: field 200
btn "Get IP Address" [
    parse read http://guitarz.org/ip.cgi [
        any [
            thru <title> copy VAR to </title>
            (append BLOCKNAME: "" VAR)
        ] to end
    ]
    VAR2: parse blockname ""
    set-face FIELD1 last VAR2
]

3.40 my-calculator.r
This example is a typical GUI calculator. It's another demostration of Rebol's powerful "Style" feature, and it shows how to use the 'Do' data source.
- Add a field widget with no actions, edit the size to 226x40 and add a 'font-size 24' property.
- Add a NewStyle
- set-face FIELD1 source
- rejoin [get-face FIELD1 get-face FIELD2]
- Edit 'get-face FIELD2' to 'face/text'. This sets the text of the field widget to whatever is already displayed in the widget, plus whatever the text is on the face of the button that's clicked.
- Add an 'across' layout word, then add 4 style widgets, and a return word, 4 mores style widgets and a return word, 4 more style widgets and a return word, then 3 more style widgets. You can delete the S1 labels on every added style widget, then add the numbers and mathematical operator symbols for the face text of each style widget, as shown in the final code below.
- Finally, add a box widget
- attempt [ACT/F1]
- VAR: do source
- copy get-face FIELD1
- set-face FIELD1 source
- VAR
- (cancel to finish the inner actions of the attempt block, then cancel to finish the action block for the box). Edit the face text from "TEXT" to " = ".
Notice that the attempt action keeps any illegal calculations (such as divide by zero) from crashing the app. Note also how the calculation in the action block of the box with the equal sign works. The VAR variable is set to the result of a 'do' operation. This 'do' operation evaluates the calculation displayed in the text of the field widget (i.e., if the face of the field is displaying 12 + 9, that do operation would evaluate to 21). Then the face of the field widget is set to display the result of that evaluation.
FIELD1: field 226x40 font-size 24 ""
style STYLE1 btn 50x50 "" [
    set-face FIELD1 rejoin [get-face FIELD1 face/text]
]
across
STYLE1 "1" STYLE1 "2" STYLE1 "3" STYLE1 " + " return
STYLE1 "4" STYLE1 "5" STYLE1 "6" STYLE1 " - " return
STYLE1 "7" STYLE1 "8" STYLE1 "9" STYLE1 " * " return
STYLE1 "0" STYLE1 "." STYLE1 " / "
box 50x50 222.184.135 " = " [
    attempt [
        VAR: do copy get-face FIELD1
        set-face FIELD1 VAR
    ]
]

3.41 my-if-example--morning-noon-afternoon.r
This example demonstrates how to use an 'if' conditional structure:
if (this is true) [do this]
- Add a 'Do' layout word
- if (CALCULATION)[ACT/F1]
- alert form source
- "LITERAL"
- Use the calculation wizard to select 'now/time = "LITERAL"'. Edit the source for the alert from "LITERAL" to "It's Noon" and edit the time from "LITERAL" to 12:00.
Follow that same procedure for 2 more actions within the 'Do' block, and edit the calculations and texts as in the code below (you could also simply copy the first line of generated code, paste it into the code window, and edit it as below).
Looking at the code, the logic should be easy to understand. You'll use 'if' and other conditional structures constantly when building all varieties of applications.
do [
    if (now/time = 12:00) [alert form "It's Noon"]
    if (now/time < 12:00) [alert form "It's Morning"]
    if (now/time > 12:00) [alert form "It's Past Noon"]
]

3.42 my-guess-the-random-number-game.r
This example demonstrates several 'if' conditional evaluations, a 'forever' loop, the 'ask' source, the 'halt' action, and random number generation. There are several layers of internal action blocks in this app, so let's look at them separately.
- Add a 'Do' layout word (the following actions are all part of the do block)
- VAR: source > 0 + random 100. Edit '0 + random 100' to '0 + random 20', or just 'random 20' (this is the first action in the 'Do' block).
- forever [ACT/F1] > (this is the 2nd action in the 'Do' block, the following actions are all inner actions of this 'forever' block)
- VAR: source > ask "TEXT". Edit VAR to VAR2. Edit "TEXT" to "Guess a number: " (this is the first action in the 'forever' block)
- VAR: source > to-TYPE VAR. Edit the first VAR to VAR3, the second VAR to VAR2 (this is the second action in the 'forever' block)
- if (calculation) [ACT/F1]. Use the calculation wizard to select VAR > VAR. Edit the first VAR to VAR3 (this is the 3rd action in the 'forever' block, the following is an inner action of this 'if' block)
- print source > "LITERAL". Edit "LITERAL" to "Guess lower"
- cancel adding inner actions to the 'if' block
- if (calculation) [ACT/F1]. Use the calculation wizard to select VAR < VAR. Edit the first VAR to VAR3 (this is the 4th action in the 'forever' block, the following is an inner action of this 'if' block)
- print source > "LITERAL". Edit "LITERAL" to "Guess higher"
- cancel adding inner actions to the 'if' block
- if (calculation) [ACT/F1]. Use the calculation wizard to select VAR = VAR. Edit the first VAR to VAR3 (this is the 5th action in the 'forever' block, the following is an inner action of this 'if' block)
- print source > "LITERAL". Edit "LITERAL" to "That's correct!"
- halt (this stops the program, without closing the console window)
- cancel adding inner actions to the 'if' block
- cancel adding inner actions to the 'forever' block
- cancel adding actions to the 'do' block
do [
    VAR: 0 + random 20
    forever [
        VAR2: ask "Guess a number:  "
        VAR3: to-integer VAR2
        if (VAR3 > VAR) [print "Guess lower"]
        if (VAR3 < VAR) [print "Guess higher"]
        if (VAR3 = VAR) [
            print "That's correct!"
            halt
        ]
    ]
]
At first glance this may look complicated, but the whole process takes just a few seconds, and it's a common sort of routine with which you'll become quickly accustomed. Read the generated code, and you'll see that it's not hard to follow. The indentation applied to the final code shown above helps to clarify which multiple actions belong in which blocks. As you become more familiar with the generated code in these sorts of 'inner actions' structures, and as you memorize the syntax of loops and conditional structures, it will actually be easier to write this type of code without using the builder at all.

3.43 my-sliding-tile-game2.r
This example demonstrates some more style and 'if' structures. We'll use some calculations in the if evaluation to check that tiles can only move if they're next to the empty space (that's the way game play works in a real life sliding tile game).
The proces for recreating this app in the builder is the same as the earlier example, except the actions for the style go like like this:
- VAR: source
- (CALCULATION) Edit the calculation to '(face/offset - box1/offset)'. This computes the distance between the current tile and the empty box.
- VAR: source
- find blk VAR
- copy ["ITEM1" "ITEM2"] Edit this VAR to VAR2, and edit ["ITEM1" "ITEM2"] to [0x100 100x0 0x-100 -100x0]. This will check to see if the result of the previous calculation means that the empty box is along one of the four sides of the current tile.
- if (calculation)[ACT/F1]
- VAR: source Edit this to VAR3
- FIELD1/offset Edit this to 'face/offset'
- FIELD1/PROPERTY: source Edit this to face/offset:
- FIELD1/offset Edit this to box1/offset
- FIELD1/PROPERTY: source Edit this to box1/offset:
- VAR3
- add 'space 0x0 origin 0x0' to the top of the generated layout code, as shown in the example code. This just eliminates any space between items in the layout.
What's happening here is that we're setting a variable to hold the XxY distance between the clicked tile and the empty box. If it's within 100 pixels on any side, then we're saving the current position of the tile, setting the position of the tile to that of the box, then setting position of the box to the previous position of the tile (swapping positions).
space 0x0 origin 0x0
style S1 btn 100x100 font-size 24 [
    VAR: (face/offset - box1/offset)
    VAR2: find copy [0x100 100x0 0x-100 -100x0] VAR
    if VAR2 [
      VAR3: face/offset
      face/offset: box1/offset
      box1/offset: VAR3
    ]
]
across
S1 "8" S1 "7" S1 "6" return
S1 "5" S1 "4" S1 "3" return
S1 "2" S1 "1" BOX1: box 100x100

3.44 my-either-example--password-validation.r
This example demonstrates an 'either' conditional evaluation:
either (calculation) [
    do this if the calculation is true
][
    do this if false
]
- Add a text widget, edit "TEXT" to "Enter Password:"
- Add a field widget
- either (calculation)[ACT/F1][ACT/F2]
- alert form source
- "LITERAL" Edit "LITERAL" to "CORRECT PASSWORD - Welcome In."
- cancel adding inner actions
- alert form source
- "LITERAL" Edit "LITERAL" to "INCORRECT PASSWORD - Entry Not Permitted."
- cancel adding inner actions 2
- Use the calculation wizard to select FIELD1/TEXT = "LITERAL". Edit "LITERAL" to "mypassword"
When the user types in a password, if it matches "mypassword" the welcome message pops up. Otherwise the 'entry not permitted' message pops up.
text "Enter Password:"
FIELD1: field 200 "" [
    either (FIELD1/TEXT = "mypassword") [
        alert form "CORRECT PASSWORD - Welcome In."
    ] [
        alert form "INCORRECT PASSWORD - Entry Not Permitted."
    ]
]


3.45 my-either-example2--checked-unchecked.r
This example demonstrates how to use an 'either' evaluation to react to a check box widget being checked/unchecked.
- Add a checkbox widget
- either (calculation)[ACT/F1][ACT/F2]
- alert form source
- "LITERAL" Edit "LITERAL" to "checked"
- cancel adding inner actions
- alert form source
- "LITERAL" Edit "LITERAL" to "unchecked"
- cancel adding inner actions 2
- Use the calculation wizard to select 'value = true'
As with many things in programming, this looks complicated at first, but it's quick and simple to understand once you've gone through the process a few times. This is another 'inner actions' structure which is actually easier to complete directly in written code, once you've got the syntax memorized.
check [
    either (value = true) [alert "checked"] [alert "unchecked"]
]


3.46 my-blogger.r
This example is a no-frills blog app that allows you to make continuous updates to a web page. It uses a bit of HTML code, which is beyond the scope of this tutorial (there are many basic HTML tutorials available online, if you want to learn how the tags work).
- Add a Do layout word
- VAR: source
- "LITERAL" Edit to ftp://user:pass@url.com/public_html/myblog.html
- Add an area widget. Edit the size to 400x300 and the default text to "Today I..."
- Add an 'across' layout word
- Add a button widget.
- type "PUBLISH" as the button text. Cancel adding any actions. Edit the size to 100.
- write/append source
- "LITERAL" Edit to ""
- VAR: source Edit 'VAR' to 'page'
- rejoin[VAR VAR2] Edit to ["
" now "^/^/" get-face a "
" read url] (this rejoin contains the HTML tags needed to display the info properly on a web page)- either (calculation)[ACT/F1][ACT/F2]
- alert source
- VAR Edit to 'er'
- Cancel adding inner actions
- browse to-url source
- VAR Edit to 'url'
- Cancel adding inner actions2
- Canel out of the calculation editor and paste this code where the calculation would be (as you see in the final code below): 'er: error? try [write url page]'
- Add another button widget
- Type "Browse" as the button text
- browse source
- cancel out of the source selector and paste the following code as in the final example below: '[browse replace replace url {ftp}{http}{public_html/}{}]'
- Add another button widget
- Type "Edit" as the button text
- editor source
- VAR Edit to 'url'
do [url: ftp://user:pass@url.com/public_html/myblog.html]
a: area 400x300 "Today I ..." across
btn 100 "PUBLISH" [
    write/append url ""
    page: rejoin ["<pre>" now "^/^/" get-face a "</pre><hr>" read url]
    either er: error? try [write url page] [alert er] [browse url]
]
btn "Browse" [browse replace replace url {ftp}{http}{public_html/}{}]
btn "Edit" [editor url]


3.47 my-ftp-tool.r
This app allows you to visually select, download, edit, create, and save any file on any FTP server to which you have username/password access (an FTP server holds all the files which make up a web site). You could use this single app to create, edit, and update web sites of any complexity.
- Add a field widget. Edit the size to 600.
- VAR: source
- to-TYPE value Edit 'to-TYPE' to 'to-url'
- either (calculation)[ACT/F1][ACT/F2]
- VAR: source Edit VAR to VAR2
- read target
- to-url value
- VAR: source Edit VAR to VAR3
- sort copy blk
- VAR Edit to VAR2
- FIELD1/PROPERTY: source
- VAR Edit to VAR3
- Cancel adding inner actions
- editor source
- VAR
- cancel adding inner actions2
- Add a text-list widget
- editor source
- to-TYPE rejoin [VAR VAR2]. Edit 'to-TYPE' to 'to-url', edit VAR to 'field1/text', edit VAR2 to 'value'.
FIELD1: field 600 "ftp://USER:PASS@URL.com/public_html/" [
    VAR: to-url value
    either (dir? VAR) [
        VAR2: read to-url value
        VAR3: sort copy VAR2
        txtlst1/data: VAR3 show txtlst1
    ] [
        editor VAR
    ]
]
TXTLST1: text-list 600x400 data [] [
    editor to-url rejoin [field1/text value]
]
Edit the default text in the field widget to "ftp://USER:PASS@URL.com/public_html/", and put in your username:password@your web site URL.


3.48 my-cam-video2.r
This example is built upon the 'my-cam-video.r' explained earlier, except it adds a text-list widget with several camera URLs and 'forever' loop which automatically and continuously refreshes the downloaded image stream.
- Add an image widget
- cancel selecting any image file and cancel selecting any actions
- Add a text list widget with the URL line items shown in the code below.
- choose 'forever [ACT/F1]' as the action, choose the following for the inner actions of the forever loop
- VAR source
- copy get-face FIELD1 Edit 'FIELD1' to 'txtlst1'
- VAR: source Edit to VAR2
- pick blk NUM Edit NUM to 1
- VAR: source Edit to VAR3
- to-TYPE VAR Edit 'to-TYPE' to 'to-url' and edit VAR to VAR2
- set-face FIELD1 source Edit 'FIELD1' to 'image1'
- load blk
- VAR Edit VAR to VAR3
- wait NUM Edit 'NUM' to 1 (or some other amount of time delay to wait)
- select 'set-face FIELD1 source' > 'load target' >
Now, when you click a camera URL from the text list, the live video feed will continuously update.
IMAGE1: image "" 320x240
TXTLST1: text-list 320x100 data [
    "http://207.251.86.238/cctv5.jpg"
    "http://207.251.86.238/cctv18.jpg"
    "http://207.251.86.238/cctv465.jpg"
    "http://207.251.86.238/cctv44.jpg"
    "http://207.251.86.238/cctv464.jpg"
    "http://207.251.86.238/cctv181.jpg"
    "http://67.141.206.85/axis-cgi/jpg/image.cgi?resolution=320x240"
] [
    forever [
        VAR: copy get-face txtlst1
        VAR2: pick VAR 1
        VAR3: to-url VAR2
        set-face image1 load VAR3
        wait 1
    ]
]

3.49 my-foreach-demonstration.r
'Foreach' is one of the the most important loop structures in Rebol programming. It allows you to do some action(s) to/with every item in a block (list).
- Add a button widget
- type "Alert Months" as the button text
- foreach ITEM blk [ACT/F1]
- alert form source
- ITEM1 Edit to "ITEM"
- select system/locale/months
btn "Alert Months" [
    foreach ITEM system/locale/months [alert form ITEM]
]
This will go through every month in the system/locale/months block and alert it to the user.


3.50 my-foreach-and-repeat-loop-examples.r
This example demonstrates some more looping techniques using 'foreach' and 'repeat' structures. Notice that the 'repeat' structure uses a number, which begins at 1 and increments by 1, each pass through the loop. To do the same thing in a foreach loop, a VAR variable is set manually and then incremented during each pass through the loop.
- Add a 'Do' layout word
- print source
- "LITERAL" Edit to ""
- Add a button widget
- type "Print Days, Foreach Loop" as the button text
- foreach ITEM blk [ACT/F1]
- print source
- ITEM1 Edit to ITEM
- Cancel adding inner actions
- Choose 'system/locale/days' as the block source
- print source
- "LITERAL" Edit to ""
- Add another button widget
- type "Count Days, Foreach Loop" as the button text
- VAR: source
- "LITERAL" Edit to 1
- foreach ITEM blk [ACT/F1]
- print source
- rejoin [VAR VAR2] Edit to [VAR " " item]
- do source
- (CALCULATION)
- ++ VAR
- Cancel adding inner actions
- Choose 'system/locale/days' as the block source
- print source
- "LITERAL" Edit to ""
- Add another button widget
- type "Count Days, Repeat Loop" as the button text
- repeat counter NUM Edit to 7
- VAR: source
- pick blk NUM Edit 'NUM' to 'counter'
- print source
- rejoin [VAR VAR] Edit to [counter " " VAR]
do [print ""]
btn "Print Days, Foreach Loop" [
    foreach ITEM1 system/locale/days [print ITEM1]
    print ""
]
btn "Count Days, Foreach Loop" [
    VAR: 1
    foreach ITEM system/locale/days [
        print rejoin [VAR " " item]
        do (++ VAR)
    ]
    print ""
]
btn "Count Days, Repeat Loop" [
    repeat counter 7 [
        VAR: pick system/locale/days counter
        print rejoin [counter " " VAR]
    ]
    print ""
]


3.51 my-timer.r
This example uses a 'repeat' structure to loop through a count, up to the number entered by the user. The 'wait' function is used to wait 1 second, during each pass of through the loop.
- Add a text widget. Edit "Text" to "Seconds:"
- Add a field widget. Edit the default displayed text to "5".
- VAR: source Edit VAR to NUM
- repeat counter NUM
- wait NUM Edit NUM to 1
- set-face FIELD1 form source
- VAR Edit 'VAR' to 'counter'
- cancel adding inner actions
- alert form source
- "LITERAL" Edit to "Done!"
text "Seconds:"
FIELD1: field "5" [
    NUM: to-integer FIELD1/text
    repeat counter NUM [
        wait 1
        set-face FIELD1 form counter
    ]
    alert "Done!"
]


3.52 my-char-day-printer--loop-example.r
This loop prints the first 2 characters of each day of the week (this code is used in a later example which prints a calender for every month of the year).
- Add a 'Do' layout word
- foreach ITEM blk [ACT/F1]
- VAR source
- copy/part blk NUM Edit NUM to 2
- VAR Edit to item
- prin source
- rejoin [VAR VAR2] Edit VAR2 to " "
do [
    foreach ITEM system/locale/days [
        VAR: copy/part item 2
        prin rejoin [VAR " "]
    ]
]

3.53 my-99-bottles-of-beer.r
This example prints out the full text to the classic "99 Bottles of Beer on the Wall".
- Add a 'Do' layout word
- VAR: source
- "LITERAL" Edit to " bottles of beer"
- VAR: source Edit to VAR2
- "LITERAL" Edit to " on the wall. "
- VAR: source Edit to VAR3
- "LITERAL" Edit to ". Take one down, pass it around. "
- for counter STARTNUM ENDNUM SKIPNUM
- print source
- rejoin [VAR VAR2]
Edit STARTNUM to 99, ENDNUM to 1, SKIPNUM to -1. Edit the rejoined elements to 'counter VAR VAR2 counter var var3 (counter - 1) var var2 "^/"', as shown in the code below:
do [
    VAR: " bottles of beer"
    VAR2: " on the wall.  "
    VAR3: ".  Take one down, pass it around.  "
    for counter 99 1 -1 [
        print rejoin [
            counter VAR VAR2
            counter var var3
            (counter - 1) var var2 "^/"
        ]
    ]
]

3.54 my-sound-player.r
This example plays any wave file (sound) selected from a text-list widget. It also demonstrates the 'change-dir' action, which changes the current folder to whatever is specified. Notice that the sound playing action is wrapped in an 'attempt' block. This ensures that the app doesn't crash if the user tries playing another sound before the first is finished.
- Add a 'Do' layout word
- change-dir %./FOLDER1/ Edit '%./FOLDER1/' to '%/c/Windows/media '
- VAR: source
- read target
- %./ (this refers to the current folder)
- remove-each ITEM blk
- do source
- (CALCULATION) Edit to %.wav <> suffix? item (this removes and files that don't end with '.wav')
- select VAR as the block source
- Add a text-list widget
- attempt [ACT/F1]
- insert snd: open sound:// load source wait snd close snd
- value
do [
    change-dir %/c/Windows/media
    VAR: read %./
    remove-each ITEM var [(%.wav <> suffix? item)]
]
TXTLST1: text-list 200x100 data var [
    attempt [insert snd: open sound:// load value wait snd close snd]
]

3.55 my-continuously-echo-clipboard-to-file.r
This app keeps a constant log of everything copied to the system clipboard.
- Add a 'Do' layout word
- print source
- "LITERAL" Edit to ""
- forever [ACT/F1]
- VAR: source Edit to VAR2
- read target
- clipboard://
- if (calculation) [ACT/F1]
- write/append target source
- %FILE Edit to %clipboard.txt
- VAR Edit to VAR2
- write/append target source
- %FILE Edit to %clipboard.txt
- VAR Edit to newline
- probe source
- VAR Edit to VAR2
- VAR: source
- copy VAR Edit to VAR2
do [
    print ""
    VAR: copy ""
    forever [
        VAR2: read clipboard://
        if (VAR <> VAR2) [
            write/append %clipboard.txt VAR2
            write/append %clipboard.txt newline
            probe VAR2
            VAR: copy VAR2
        ]
    ]
]

3.56 my-paypal-report.r
This example downloads a CSV (comma separated value) file in the format which Paypal uses to provide account information, goes through each line in the file using a foreach loop, parses out the time value in each line (the 4th item on each line), performs 2 conditional evaluations on the time value, and prints the name of any line (item 8 on each line) in which the time values match the conditional criteria.
- Add a 'Do' layout word
- VAR: source
- read/lines target
- http://URL.com/FILE Edit to http://re-bol.com/Download.csv
- VAR: source Edit to VAR2
- at blk NUM Edit NUM to 2 (this eliminates the first line of the downloaded file (the first line is headers (column titles), as opposed to actual data))
- foreach ITEM blk
- VAR: source Edit to VAR3
- parse VAR "," Edit VAR to item
- VAR: source Edit to VAR4
- pick blk NUM Edit NUM to 2
- VAR as the block source - Edit to VAR3
- if (calculation) [ACT/F1]
- VAR: source
- pick blk NUM Edit NUM to 8
- VAR as the block source - Edit to VAR3
- print source
- VAR Edit to VAR6
do [
    VAR: read/lines http://re-bol.com/Download.csv
    VAR2: at VAR 2
    foreach ITEM VAR2 [
        VAR3: parse item ","
        VAR4: pick VAR3 2
        VAR5: to-time VAR4
        if ((VAR5 >= 0:00) and (VAR5 <= 12:00)) [
            VAR6: pick VAR3 8
            print var6
        ]
    ]
]

3.57 my-calendar.r
This app allows the user to select any date(s) and then view/edit/save events for the selected date. It demonstrated the 'insert at' action (used to insert a value into a specific index location in a block) and the 'select' source (used to choose the next thing after a found item in a block).
- Add a 'Do' layout word
- write/append target source
- %FILE Edit to any file name you want
- "LITERAL" Edit to "". All this Do operation does is create a new empty file, if it doesn't already exist.
- Add an area widget
- Add a button widget
- type "Select Date" as the button text
- VAR: source
- request-date
- set-face FIELD1 source Edit FIELD1 to txt1
- VAR
- VAR: source Edit to VAR2
- load target
- %FILE
- VAR: source Edit to VAR3
- select blk VAR
- VAR Edit to VAR2
- set-face FIELD1 source Edit FIELD1 to area1
- VAR Edit to VAR3
- Add another button widget
- type "Save" as the button text
- VAR: source Edit to VAR4
- insert (at blk NUM) source Edit NUM to 1
- VAR Edit to VAR4
- VAR Edit to VAR2
- save target source
- %FILE
- VAR Edit to VAR2
- alert form source
- "LITERAL" Edit to "Saved"
do [write/append %FILE ""]
TXT1: text 200 "" []
AREA1: area 200x100 ""
BTN1: btn "Select Date" [
    VAR: request-date
    set-face txt1 VAR
    VAR2: load %FILE
    VAR3: select VAR2 VAR
    set-face area1 VAR3
]
BTN1: btn "Save" [
    VAR4: reduce copy [var1 area1/text]
    insert (at VAR2 1) VAR4
    save %FILE VAR2
    alert "Saved"
]


3.58 my-contacts.r
This app allows the user to store, retrieve, and edit contact information for any number of people. It demonstrates the 'extract blk NUM' action.
You can type/view any structured or unstructed information in the area widget that you want, but if you save just an email address there, it will work nicely with our next example app (an email sender app, which will use the saved email address for any of your contacts).
- Add a field widget
- Add an area widget
- Add and 'across' layout word
- Add a button widget
- type "Load" as the button text
- write/append target source
- %FILE Edit to any file name you want (in this example, it's been edit to %contacts)
- "LITERAL" Edit to "". All this operation does is create a new empty file, if it doesn't already exist.
- VAR: source Edit to BLOCKNAME:
- copy source
- load target
- %FILE
- VAR: source
- extract blk NUM Edit to 2
- VAR Edit to BLOCKNAME
- VAR: source Edit to VAR2
- request-list "Title:" "Default Text" Edit to "Select Contact:" VAR
- set-face FIELD1 source
- VAR Edit to VAR2
- set-face FIELD1 source Edit to area1
- select blk VAR
- VAR Edit to BLOCKNAME
- VAR Edit to VAR2
- Add another button widget
- type "Save" as the button text
- VAR: source Edit to VAR3
- get-face FIELD1
- write/append target source
- mold source
- VAR Edit to VAR3
- %FILE
- VAR: source Edit to VAR4
- get-face FIELD1 Edit to area1
- write/append target source
- mold source
- VAR Edit to VAR4
- %FILE
- Add another button widget
- type "Edit" as the button text
- editor source
- read target
- %FILE
FIELD1: field 200 ""
AREA1: area 200x100 ""
across
btn "Load" [
    write/append %contacts ""
    BLOCKNAME: copy load %contacts
    VAR: extract BLOCKNAME 2
    VAR2: request-list "Select Contact:" VAR
    set-face FIELD1 VAR2
    set-face area1 select BLOCKNAME VAR2
]
btn "Save" [
    VAR3: get-face FIELD1
    write/append %contacts mold VAR3
    VAR4: get-face area1
    write/append %contacts mold VAR4
]
btn "Edit" [
    editor read %contacts
]


3.59 my-mailer.r
This example will send emails to any of the contacts saved with the previous app. It demonstrates the 'extract/index' action.
For this app to work properly, you should save only an email address in the area widget when using the contacts app.
- Add an area widget
- Add an 'across' layout word
- Add a button widget
- type "Send" as the button text
- VAR: source
- request-list "Title:" blk Edit to "Recipient:"
- extract/index VAR NUM COLUMN. Edit VAR to 'load %contacts', edit NUM to 2, edit COLUMN to 2
- send to-email NAME@URL source Edit NAME@UR to VAr
- get-face FIELD1 Edit to area1
- alert form source
- "LITERAL" Edit to "Sent"
AREA1: area 400x300 ""
across
BTN1: btn "Send" [
    VAR: request-list "Recipient:" extract/index load %contacts 2 2
    send to-email VAR get-face area1
    alert form "Sent"
]


3.60 my-share-files.r
This app allows you to share any number of files with any number of individual people. Each person gets their own unique download page. Download pages for each person are created automatically if they don't already exist. To use this app, you need username:password access to a single folder on any FTP server.
- Add a field widget. Edit the default displayed text to {ftp://USER:PASS@URL.com/public_html/folder/}, with your username, password, and URL.
- Add another field widget. Edit the default text to "name.html". You'll replace 'name' with the name of the person (this creates their unique 'name.html' download page at http://URL.com/folder/name.html).
- VAR: source Edit 'VAR' to 'html'
- copy ""
- foreach ITEM blk [ACT/F1]
- VAR: source Edit to 'file'
- last blk
- load VAR. Edit 'load' to 'split-path', edit 'VAR' to 'item' ('split-path' gets just the file name, without the folder information, from the selected file).
- print source
- VAR Edit to file
- VAR: source
- rejoin [VAR VAR2] Edit to [field1/text file]
- write/binary target source
- read VAR Edit to 'read/binary file'
- VAR Edit to 'to-url VAR'
- append blk source
- rejoin [VAR VAR2] Edit to [{} file "
" newline] (this is HTML code which simply create a link to the file being uploaded)- VAR Edit to 'html'
- 'request-file' as the block source
- VAR: source Edit to 'page:'
- to-TYPE rejoin [VAR VAR2] Edit 'to-TYPE' to 'to-url', edit [VAR VAR2] to [field1/text field2/text]
- write/append target source
- VAR edit to 'html'
- VAR edit to 'page'
- editor source
- VAR edit to 'page'
- browse source
- VAR edit to 'page'
FIELD1: field 200 {ftp://USER:PASS@URL.com/public_html/folder/}
FIELD2: field 200 "name.html" [
    html: copy ""
    foreach ITEM request-file [
        file: LAST split-path item
        print file
        VAR: rejoin [field1/text file]
        write/binary to-url VAR read/binary file
        append html rejoin [
            {<a href="} file {">} file "</a><br>" newline
        ]
    ]
    page: to-url rejoin [field1/text field2/text]
    write/append page html
    editor page
    browse page
]


3.61 my-bar-chart.r
This app creates a bar chart from data which the user inputs. It works by creating a new GUI layout of button widgets whose width in pixels is specified by each data value to be graphed. A foreach loop is used to construct the layout block of button widgets.
- Add a button widget
- type "Input Data" as the button text
- VAR: source
- request-text/title/default "Title:" "Default Text". Edit to "Data:" {["March" 13 "April" 9 "May" 21 "June" 29 "July" "10"]}. Notice that the default text contains a data block of month names and values to be graphed.
- Add another button widget
- type "Display Bar Char" as the button text
- VAR: source Edit to VAR2
- load blk
- copy []
- foreach [ITEM1 ITEM2] blk [ACT/F1]. This goes through the data block entered by the user, in groups of 2 items (month name and value to be graphed), labeling those 2 items ITEM1 and ITEM2 in each iteration of the foreach loop.
- append blk source
- reduce blk Edit blk to ['btn item1 (to-integer item2) * 10]. This adds the code for a new button widget to the block labeled VAR2. The text on the button is the month name, and the size of the button is 10 * the data value to be graphed.
- VAR edit to VAR2
- select 'load VAR' as the block source for the foreach loop
- view/new layout source
- VAR edit to VAR2
btn "Input Data" [
    VAR: request-text/title/default "Data:"
        {["March" 13 "April" 9 "May" 21 "June" 29 "July" "10"]}
]
btn "Display Bar Chart" [
    VAR2: load copy []
    foreach [ITEM1 ITEM2] load VAR [
        append VAR2 reduce ['btn item1 (to-integer item2) * 10]
    ]
    view/new layout VAR2
]


3.62 my-madlib.r
This app creates a madlib from text entered by the user. It demonstrates a common form of the parse function, used to search for a given text deliniation syntax.
- Add a 'Do' layout word
- VAR: request-text/title/default "Title:" "Default Text". Edit to "Madlib Text:" {
found a . ate the .}. The user can edit this text to anything they want. Just follow the syntax of putting madlib words between pointy brackets. - parse source [any [thru "START" copy VAR to "END" (append BLOCKNAME: [] VAR)] to end]. Edit "START" to "<", edit "END" to ">", edit VAR to VAR2.
- VAR. This parse operation searches the entire text stored in VAR for any instances of text which start with "<" and end with ">", and copies each of those bits of text to a block labeled BLOCKNAME.
- foreach ITEM blk [ACT/F1]
- replace/all blk VAR source
- select 'ask "TEXT"' as source. Edit "TEXT" to 'join ITEM ": "'
- select 'VAR' as block source for the replace action.
- select unique blk
- VAR Edit to 'blockname' as the block source for the foreach loop.
- alert form source
- VAR
do [
    VAR: request-text/title/default "Madlib Text:"
        {<name> found a <thing>. <name> ate the <adjective> <thing>.}
    parse VAR [any [
        to "<" copy VAR2 thru ">" (append BLOCKNAME: [] VAR2)
    ] to end]
    foreach ITEM unique blockname [
        replace/all VAR ITEM ask join ITEM ": "
    ]
    alert form VAR
]


3.63 my-chat.r
This app allows users to sign in to a multi-user text chat which is stored in a single file on an FTP server.
- Add a 'Do' layout word
- VAR: source Edit to 'url'
- "LITERAL". To test this app on a local computer, edit "LITERAL" to %chatfile. To run the app live on the Internet, simply edit this file name to ftp://USER:PASS@URL.com/public_html/FILE , with the username:password and file info of your web server (this app will create the chat file if it doesn't already exist).
- write/append target source
- "LITERAL" Edit to ""
- VAR Edit to url
- VAR: source Edit to name
- ask "TEXT" Edit to "^LName: " (that ^L control code prints a new empty page in the console)
- forever [ACT/F1]
- VAR: source Edit to notes
- read target
- VAR Edit to url
- VAR: source
- rejoin [VAR VAR2] Edit to [newpage notes "Message: "]
- VAR: source Edit to message
- ask "TEXT" Edit "TEXT" to VAR
- VAR: source Edit to VAR2
- rejoin [VAR VAR] Edit to [now " (" name "): " message "^/^/"]
- write/append target source
- VAR Edit to VAR2
- VAR Edit to url
do [
    url: %chatfile   ; ftp://USER:PASS@URL.com/public_html/FILE
    write/append url ""
    name: ask "^LName:  "
    forever [
        notes: read url
        VAR: rejoin [newpage notes "Message:  "]
        message: ask VAR
        VAR2: rejoin [now "  (" name "):  " message "^/^/"]
        write/append url VAR2
    ]
]

3.64 my-network-sender.r
This app allows users to broadcast message over a network. Any users on the network who have the receiver app will see these messages appear on screen.
- Add a 'Do' layout word
- net-out: open/lines udp://255.255.255.255:9905 set-modes net-out [broadcast: on]. Advanced users can edit the IP address and port if desired.
- Add a text widget, edit the default "TEXT" to "Name:"
- Add a field widget with no default text and no actions
- Add a text widget, edit the default "TEXT" to "Message:"
- Add a field widget
- insert net-out source
- rejoin [VAR VAR2] Edit to [get-face FIELD1 ": " get-face FIELD2]
do [
    net-out: open/lines udp://255.255.255.255:9905
    set-modes net-out [broadcast: on]
]
text "Name:"
FIELD1: field
text "Message:"
FIELD2: field [
    insert net-out rejoin [get-face FIELD1 ":  " get-face FIELD2]
]
This app send messages using the UDP network protocol. You could also send files and other information from any data source. Anyone on the network can read the broadcast messages (you could encrypt the data if you don't want some users to read all the broadcast messages). This type of app is meant for use on a local area network - the sort of network typically found in homes and small businesses (typically created using a wireless router, to provide Internet access to all users in the location).

3.65 my-network-receiver.r
This app receives and displays messages send using the previous message sender app.
- Add a 'Do' layout word
- net-in: open udp://:9905 (you can edit the port number if you want)
- print source
- "LITERAL" Edit to "waiting..."
- forever [ACT/F1]
- VAR: source
- wait [net-in]
- prin source
- copy VAR
do [
    net-in: open udp://:9905
    print "waiting..."
    forever [
        VAR: wait [net-in]
        prin copy VAR
    ]
]

3.66 my-draw-dialect-default-example.r
This example demonstrates how to add a box which can be drawn upon using Rebol draw commands. You can read more about the Rebol draw dialect at http://www.rebol.com/docs/draw.html.
- Add a new draw widget.
- You can edit the draw commands in the generated draw block.
box black effect [
    draw [circle 25x25 line 10x90 90x30]
]

3.67 my-draw-animate-example.r
This example demonstrates how a draw block can be altered (just like any other Rebol data block, using the block actions provided in the App Builder), to create animations. In this case, a foreach loop adds draw commands taken from a previously created block, once every second. In apps such as games, the commands in a draw block, including the coordinates of images, and all the properties of any included draw command could be altered based upon conditional evaluations, calculations, user input, etc.
- Add a 'Do' layout word
- VAR: source
- load blk
- copy [] Edit this empty block, to the block drawn commands shown in the code below.
- Add a draw widget. Edit the size of the box to 400x200, and edit the default block of draw to commands to []
- Add a button widget
- type "Draw Figure" as the button text
- foreach ITEM blk [ACT/F1]
- append blk source
- ITEM1 Edit to ITEM
- VAR Edit to 'DRAW1/effect/draw'
- show FIELD1 Edit to DRAW1
- wait NUM Edit to 1
do [
    VAR: load copy [
        [line 1x20 400x20] [line 200x20 200x40] [circle 200x60 20]
        [line 200x80 200x120] [line 200x100 160x80]
        [line 200x100 240x80] [line 200x120 170x150]
        [line 200x120 230x150]
    ]
]
DRAW1: box 0.0.0 400x200 effect [draw []]
btn "Draw Figure" [
    foreach ITEM VAR [
        append DRAW1/effect/draw ITEM
        show DRAW1
        wait 1
    ]
]

3.68 my-cash-register.r
- Add a NewStyle layout word with no actions
- edit the style to a field of 80 pixels, and delete the RGB color value.
- Add and 'across' layout word
- Add a text widget, edit the default "TEXT" to "Cashier:"
- Add a style word, and change the default label to 'cashier:'
- Add a text widget, edit the default "TEXT" to "Item:"
- Add a style word, and change the default label to 'item:'
- Add a text widget, edit the default "TEXT" to "Price:"
- Add a style word, and change the default label to 'price:'
- if error? try [ACT/F1][ACT/F2]
- VAR: source
- to-TYPE get-face FIELD1 Edit 'to-TYPE' to 'to-money', edit 'FIELD1' to 'price'
- cancel adding inner actions
- alert form source
- "LITERAL" Edit to "Price Error"
- return
- cancel adding inner actions2
- VAR: source
- reduce blk
- copy [] Edit to [mold get-face item tab get-face price newline]
- append blk source
- FIELD1/text edit to AREA1/text
- VAR
- set-face FIELD1 source Edit FIELD1 to item
- "LITERAL" Edit to ""
- set-face FIELD1 source Edit FIELD1 to price
- "LITERAL" Edit to ""
- VAR: "LITERAL" Edit "LITERAL" to 0
- foreach [ITEM1 ITEM2] blk [ACT/F1] Edit [ITEM1 ITEM2] to [ITEM price]
- VAR: source Edit VAR to sum
- (CALCULATION) Use the calculation wizard to select (VAR + to-TYPE VAR), and edit the calculation to (sum + to-money price)
- cancel adding inner actions
- set-face FIELD1 source Edit FIELD1 to subtotal
- form VAR Edit to 'form sum'
- set-face FIELD1 source Edit FIELD1 to tax
- (CALCULATION) Edit to (sum * .06), change the .06 value to your state's sales tax percentage
- set-face FIELD1 source Edit FIELD1 to total
- (CALCULATION) Edit to (sum * .106), change the 1.06 value to 1 + your state's sales tax percentage
- Add a return layout word
- Add an area widget with no text. Edit the size to 600x300
- Add a return layout word
- Add a text widget, edit the default "TEXT" to "Subtotal:"
- Add a style word, and change the default label to 'subtotal:'
- Add a text widget, edit the default "TEXT" to "Tax:"
- Add a style word, and change the default label to 'tax:'
- Add a text widget, edit the default "TEXT" to "Total:"
- Add a style word, and change the default label to 'Total:'
- Add a button widget
- type "Save" as the button text
- VAR: source Edit VAR to items
- copy FIELD1/PROPERTY Edit to AREA1/TEXT
- VAR: source Edit VAR to items
- load VAR edit VAR to items
- VAR: source Edit VAR to items
- mold VAR edit VAR to items
- VAR: source Edit VAR to items
- trim/lines VAR edit VAR to items
- write/append target source
- rejoin [VAR VAR] Edit to [items newline get-face cashier newline now/date newline]
- %FILE Edit to %sales.txt
- clear-fields W (the App Builder labels the main App layout window 'W'. This clears all the fields in the window)
- set-face FIELD1 source Edit to area1
- "LITERAL" Edit to "" (this clears the area widget)
style STYLE1 field 80
across
text "Cashier:" cashier: STYLE1
text "Item:" item: STYLE1
text "Price:" price: field 80 [
    if error? try [to-money get-face price] [
        alert form "Price Error"
        return
    ]
    VAR: reduce [mold get-face item tab get-face price newline]
    append AREA1/TEXT VAR
    set-face item ""
    set-face price ""
    sum: 0
    foreach [ITEM price] load copy AREA1/TEXT [
        sum: (sum + to-money price)
    ]
    set-face subtotal form sum
    set-face tax (sum * 6E-2)
    set-face total (sum * 1.06)
]
return AREA1: area 600x300 return
text "Subtotal:" subtotal: STYLE1
text "Tax:" tax: STYLE1
text "Total:" total: STYLE1
btn "Save" [
    items: copy AREA1/TEXT
    items: load items
    items: mold items
    items: trim/lines items
    write/append %sales.txt rejoin [
        items newline get-face cashier newline now/date newline
    ]
    clear-fields W
    set-face area1 ""
]

3.69 my-cash-register-report.r
This app reads the sales data generated by the previous cash register app. It reads in each line of data, uses a foreach loop to separate items, cashier, and date values, performs a conditional 'if' evaluation to see if the records belong to the current day, and then uses another foreach loop to go through each item in current day transactions, to create a running total of the items sold that day.
- Add a 'Do' layout word
- VAR: source Edit 'VAR' to 'sum'
- "LITERAL" Edit to $0.00
- VAR: source Edit 'VAR' to 'sales'
- read/lines target
- %FILE Edit to %sales.txt
- foreach [ITEM1 ITEM2] blk [ACT/F1] Edit [ITEM1 ITEM2] to [items cashier date]
- if (calculation) [ACT/F1]
- foreach [ITEM1 ITEM2] blk [ACT/F1] Edit [ITEM1 ITEM2] to [item price]
- VAR: source Edit 'VAR' to 'sum'
- (CALCULATION) Use the calculation wizard and edit to (sum + to-money price)
- cancel adding foreach inner actions
- cancel adding if inner actions
- Use the calculation wizard and edit to (now/date = to-date date)
- cancel adding foreach inner actions
- cancel adding do actions
do [
    sum: $0.00
    sales: read/lines %sales.txt
    foreach [items cashier date] sales [
        if (now/date = to-date date) [
            foreach [item price] load items [
                sum: (sum + to-money price)
            ]
        ]
    ]
    alert form rejoin ["Total sales today:  " sum]
]

3.70 my-jam-session-chord-looper.r
This app loops musical chord progressions. It's meant to provide an audio backing track for musicians to practice 'jamming' over any given progression of chords.
The wave file sounds of all possible individual chord strums played on a guitar are downloaded from http://re-bol.com/chords.r. The user can then type in the names of any set of chords, and the app loops through playing those chord sounds over and over. The speed (delay between each chord sound) can be adjusted by the user.
- Add a 'Do' layout word
- insert-event-func [e: :event either e/type = 'close [if request "Really Quit?" [e]] [e]]
- do source
- load target Edit 'load' to 'load-thru' (this saves a cached local copy of the downloaded file)
- http://URL.com/FILE Edit to http://re-bol.com/chords.r
- VAR: source Edit 'VAR' to 'play'
- false
- Add an 'across' layout word
- Add a text widget. Edit the default "TEXT" to "Chords:"
- Add a 'return' layout word
- Add an area widget. Edit the 'AREA1:' label to 'chords:', edit the default text to "bm bm g g d d em gb7"
- Add a 'return' layout word
- Add a text widget. Edit the default "TEXT" to "Delay:"
- Add a field widget. Edit the 'FIELD1:' label to 'tempo:', edit the size to 50 pixels, edit the default text to "0.35"
- Add a text widget. Edit the default "TEXT" to "(seconds)"
- Add a 'return' layout word
- Add a button widget
- type "Play" as the button text
- VAR: source Edit to 'play:'
- true
- VAR: source Edit to 'the-tempo:'
- to-TYPE get-face FIELD1 Edit to 'to-decimal get-face tempo'
- VAR: source Edit to 'sounds:'
- to-TYPE get-face FIELD1 Edit to 'to-block get-face chords'
- wait NUM Edit to 1
- VAR: source Edit to 'sound-port:'
- open PORT:// Edit to 'open sound://'
- forever [ACT/F1]
- foreach ITEM blk [ACT/F1] Edit ITEM to 'sound'
- if (calculation) [ACT/F1]
- break
- cancel adding 'if' inner actions
- select (VAR = false) in the calculation wizard and edit 'VAR' to 'play'
- wait NUM Edit NUM to 'sound-port'
- wait NUM Edit NUM to 'the-tempo'
- cancel adding 'foreach' inner actions
- select VAR as the block for the foreach loop. Edit to 'sounds'
- if (calculation) [ACT/F1]
- break
- cancel adding 'if' inner actions
- select (VAR = false) in the calculation wizard and edit 'VAR' to 'play'
- cancel adding 'forever' inner actions
- cancel adding button actions
- Add another button widget
- type "Stop" as the button text
- VAR: source Edit to 'play'
- false
- close PORT:// Edit to 'close sound://'
do [
    insert-event-func [
        e: :event either e/type = 'close [
            if request "Really Quit?" [quit e]
        ] [e]
    ]
    do load-thru http://re-bol.com/chords.r
    play: false
]
across
text "Chords:" return
chords: area 392x300 "bm bm g g d d em gb7" return
text "Delay:" tempo: field 50 "0.35" text "(seconds)"
btn "Play" [
    play: true
    the-tempo: to-decimal get-face tempo
    sounds: to-block get-face chords
    wait 0
    sound-port: open sound://
    forever [
        foreach sound sounds [
            if (play = false) [break]
            VAR: do rejoin ["insert sound-port " sound]
            wait sound-port
            wait the-tempo
        ]
        if (play = false) [break]
    ]
]
btn "Stop" [
    play: false
    close sound-port
]

3.71 my-function-example.r
This example demonstrates how to use basic function structures. Functions allow you to group any number of actions under a single word, which you assign. Functions also allow you to include 'arguments' or labeled data values which are typed immediately after the function label word. In this example, we'll create a function labeled 'saymantra', which accepts one argument, labeled 'ARG1'. Whenever that function is run, it alerts the ARG1 text 3 times.
- Add a 'Do' layout word
- VAR: source Edit to 'saymantra'
- func [ARG1] [ACT/F1]
- alert form source
- ARG1
- alert form source
- ARG1
- alert form source
- ARG1
- cancel adding function inner actions
- Add a button widget
- type "Repeat Mantra" as the button text
- FUNCTION2 ARG1 Edit FUNCTION2 to 'saymantra', edit ARG1 to {I am good enough, strong enough, and gosh darnit...}
Every time the user clicks the button, the text "I am good enough, strong enough, and gosh darnit..." will be alerted 3 times. Can you figure out how to make the saymantra function alert some text the user enters, when the button is pushed?
do [
    saymantra: func [ARG1] [
        alert form ARG1
        alert form ARG1
        alert form ARG1
    ]
]
btn "Repeat Mantra" [
    saymantra {I am good enough, strong enough, and gosh darnit...}
]


3.72 my-countdown-timer.r
This example demonstrates another function. The 'count' function prints a "counting down" message, waits the given amount of time, then prints a done message.
- Add a 'Do' layout word
- VAR: source Edit to 'count'
- func [ARG1] [ACT/F1]
- print source
- rejoin [VAR VAR2] Edit to ["counting down " arg1 " seconds..."]
- wait NUM Edit to ARG1
- alert form source
- rejoin [VAR VAR2] Edit to ["It's been " arg1 " seconds!"]
- cancel adding function inner actions
- Add a button widget
- type "Count Down Timer" as the button text
- FUNCTION2 ARG1 Edit FUNCTION2 to 'count', edit ARG1 to 3.
do [
    count: func [ARG1] [
        print rejoin ["counting down " arg1 " seconds..."]
        wait arg1
        alert form rejoin ["It's been " arg1 " seconds!"]
    ]
]
btn "Count Down Timer" [count 3]


3.73 my-generic-crud-database.r
This is a typical little generic CRUD database app. Similar in functionality to a rotating card file, the app allows you to create new 'cards' full of information, save the card, load the card, edit the card, etc.
- Add a 'Do' layout word
- FUNCTION1: does [ACT/F1] Edit FUNCTION1 to 'n'
- foreach ITEM blk [ACT/F1]
- set-face source
- VAR Edit to 'get item ""'
- cancel adding foreach inner actions
- cancel adding function actions
- FUNCTION1: does [ACT/F1] Edit FUNCTION1 to 's'
- save target source
- %FILE Edit to %d
- VAR Edit to d
- alert form source
- "LITERAL" Edit to "ok"
- cancel adding function actions
- FUNCTION1: does [ACT/F1] Edit FUNCTION1 to 'x'
- FUNCTION1 Edit to 'z'
- VAR: source
- reduce blk
- copy [] Edit to [a/text b/text c/text]
- append blk source
- VAR Edit to 'd'
- VAR
- cancel adding function actions
- FUNCTION1: does [ACT/F1] Edit FUNCTION1 to 'x'
- attempt [ACT/F1]
- VAR: source Edit to VA
- extract blk NUM Edit NUM to 3
- d
- VAR: source Edit to VA2
- request-list "Title:" blk Edit "Title:" to "", Edit blk to VA
- VAR: source Edit to VA3
- find blk VAR Edit VAR to VA2
- d
- VAR: source Edit to VA4
- copy/part blk NUM Edit NUM to 3
- VAR Edit to VA3
- VAR: source Edit to VA5
- copy [] Delete the 'copy', and edit to [a b c]
- repeat counter NUM Edit NUM to 'length? va5'
- VAR: source Edit to VA6
- pick blk NUM Edit NUM to 'counter'
- VAR Edit to VA5
- VAR: source Edit to VA7
- pick blk NUM Edit NUM to 'counter'
- VAR Edit to VA4
- set-face FIELD1 source Edit FIELD1 to 'get va6'
- VAR Edit to VA7
- cancel adding attempt inner actions
- cancel adding function actions
- FUNCTION1: does [ACT/F1] Edit FUNCTION1 to 'z'
- remove-each ITEM blk [(calculation)] Edit ITEM to '[i j k]'
- use the calculation wizard, then edit to '(a/text = i)'
- cancel adding remove-each actions
- select VAR as the foreach block, edit to 'd'
- write/append target source
- "LITERAL" Edit to ""
- %FILE Edit to %d
- VAR: source Edit to 'd:'
- load target
- %FILE Edit to %d
- cancel adding function actions
- cancel adding 'Do' actions
- Add a field widget without any actions or default texts. Edit the default 'FIELD1:' label to 'a:'
- Add a field widget without any actions or default texts. Edit the default 'FIELD1:' label to 'b:'
- Add an area widget without any actions or default texts. Edit the default 'AREA1:' label to 'c:'
- Add an 'across' layout word
- Add a button widget
- type "New" as the button text
- FUNCTION1 Edit to 'n'
- Add a button widget
- type "Delete" as the button text
- VAR: source
- request "Question?" Edit to "Really Delete?"
- if (calculation) [ACT/F1]
- FUNCTION1 Edit to 'z'
- FUNCTION1 Edit to 'n'
- cancel adding 'if' inner actions
- cancel adding button actions
- Add a button widget
- type "Save" as the button text
- FUNCTION1 Edit to 'x'
- Add a button widget
- type "Edit" as the button text
- FUNCTION1 Edit to 'y'
- Add a button widget
- type "COMMIT" as the button text
- FUNCTION1 Edit to 's'
- Add a button widget
- type "Raw" as the button text
- editor source
- read target
- %FILE Edit to %d
do [
     n: does [
         foreach ITEM [a b c] [
             set-face get item ""
             focus a
         ]
     ]
     s: does [
         save %d d
         alert form "ok"
     ]
     x: does [
         z
         VAR: reduce [a/text b/text c/text]
         append d var
         n
     ]
     y: does [
         attempt [
             VA: extract d 3
             VA2: request-list "" VA
             VA3: find d VA2
             VA4: copy/part VA3 3
             VA5: [a b c]
             repeat counter length? va5 [
                 VA6: pick va5 counter
                 VA7: pick va4 counter
                 set-face get va6 va7
             ]
         ]
     ]
     z: does [
         remove-each [i j k] d [
             (a/text = i)
         ]
     ]
     write/append %d ""
     d: load %d
 ]
 a: field
 b: field
 c: area
 across
 btn "New" [n]
 btn "Delete" [
     VAR: request "QUESTION?"
     if (VAR) [z n]
 ]
 btn "Save" [x]
 btn "Edit" [y]
 btn "COMMIT" [s]
 btn "Raw" [editor read %d]
At this point, you've finished entering all the App Builder examples. You likely have a pretty good idea about how basic Rebol code is put together. It's recommended that you read http://re-bol.com/rebol_quick_start.html and http://re-bol.com/short_rebol_examples.r. You'll see the examples presented here in the App Builder tutorial, but without the App Builder to help you pick and edit bits of code. You'll be forced to remember how each code structure works, memorize the proper syntax, and type it by rote. Take a look through the additional short example apps at that second link, and see if you can understand how they work. When you've read through those 2 texts, take a look at http://business-programming.com. That text is an 800 page book which covers much of what there is to know about Rebol, in depth, and with more than 100 deep examples. That text will teach you how to accomplish virtually anything you want with Rebol. There are 10s of thousands of lines of Rebol code which you can use and adapt to your own apps. You can find the raw code to many of the examples in that book at http://re-bol.com/examples.txt.


4. General Rebol Help
Click the 'Reference' button to get help with all the built-in Rebol function words, key codes, colors, images, and important elements of VID (the default Rebol GUI system). Click the 'Console' button to open a fully functional Rebol console - anything and everything possible in Rebol can be accessed there. Type 'help
', 'help svv', 'help system', 'help system', and 'source ' into the console, to explore much of what there is to know about Rebol. Click the 'Docs' button to visit sites such as http://business-programming.com and http://rebolforum.com, where you can find much deeper instruction, and help from community members.
5. Advanced Users
You can easily add functionality to the App Builder IDE by editing the 'act and 'ad functions in the program code, and by adding more GUI widgets. Just follow the syntax demonstrated in the code of the existing features.
6. A 5 Minute Rebol Language Tutorial To Be Used With The App Builder
You can edit Rebol code with your favorite text editor (Notepad++, Textmate, etc.)
Alternately, you can run Rebol, click the "Console" icon, and paste in any code example. Or, use Rebol's built in text editor by typing 'editor none' at the console. Press the F5 key in the editor to save and run any edited code. You don't need any other 3rd party tools to work with Rebol. You can also drag-and-drop any text file full of Rebol code onto the Rebol interpreter, and the script will run, even if Rebol isn't installed. And finally, you can type 'do URL' into the Rebol console, where URL is the http:// or ftp:// web site address, or file location of a script on your hard drive.
To make Rebol automatically open to the console every time it starts, click "User" and uncheck "Open desktop at startup".
6.1 Getting Started with Graphic User Interfaces ('GUIs' or 'UIs')
Every Rebol program starts with a header. Put this line at the beginning of every script (text file full of code) you create:
rebol []Optional title text and other info about your app can be included in the header. Edit it as you see fit:
rebol [
  title: "My App"
  date:   5-jan-2017
  info:  "The best app ever"
]
Any text following a semi-colon is ignored by Rebol (such text is a 'comment' to help humans understand what's going on in the code).
; this is a comment, it's ignored by the Rebol interpreterRebol has a built-in dialect called 'VID' to create graphic user interfaces ("GUI" windows, "screens", "forms", which contain buttons, text fields, drop-down boxes, etc.). GUI widgets are enclosed in square brackets after the words "view layout". The following code creates a window which contains a text entry field and a button:
view layout [field btn]Multiple widgets in a window layout are typically placed on separate indented lines, but indentation is NOT required:
view layout [
  btn
  field
  area
  text-list
  image
  box
  drop-down
  check
  box
  text
]
You can add properties such as text, size, color, font, and data to widgets. Read every item on each line in this example, and then run the code see each property displayed in the layout:
view layout [
  btn "Click me"
  field 200 "type here..."
  area 400x100 wrap "type^/multiple lines^/here..."
  text-list 400x100 data ["item1" "item2" "item3"]
  image logo.gif
  box red 50x50 "red box"
  drop-down 100 data ["item1" "item2" "item3"]
  check yellow
  text bold font-size 24 "big text"
]
By default, widgets are placed consecutively below one another on screen. Use the words 'across', 'return', 'below'. and 'at' to adjust the layout as you please:
view layout [
  btn "Click me"   ; first 2 widgets are below one another, by default
  field 200 "type here..."
  ACROSS   ; following widgets are placed across the screen
  area 200x100 wrap "type^/multiple lines^/here..."
  text-list 200x100 data ["item1" "item2" "item3"]
  RETURN   ; new line, then everthing following goes across the screen
  image logo.gif
  drop-down 100 data ["item1" "item2" "item3"]
  BELOW    ; following widgets are placed below one another again
  box red 50x50 "red box"
  check
  AT 260x230 text bold font-size 24 "Big"  ; 260 pixels over, 230 down
]
Use the word 'style' to create a new type of widget, which inherits the properties of any existing widget, and adds new properties to it:
view layout [
  style mybox box blue 100x100 "I'm a blue box"    ; new style 'mybox'
  mybox                ; 3 mybox widgets placed onto the screen layout
  mybox
  mybox
]
6.2 Actions
Add ACTIONS, which run whenever the user INTERACTS with a widget, by enclosing the actions in square brackets. This button alerts the user with a message whenever it's clicked:
view layout [
  btn "Click me" [alert "Hi"]
]
To become proficient in Rebol, you'll need to learn how to use these built-in function words (and eventually about 400 more action words):
alert form source
set-face FIELD1 source
write target source
write/append target source
write/binary source
VAR: source
VAR: do source
VAR: load blk
save target blk
append blk source
append TXTLST1/data copy FIELD1/text show TXTLST1
replace/all blk VAR source
remove/part find blk source NUM
insert (at blk NUM) source
move/to (find blk source) NUM
poke blk NUM source
clear blk
foreach ITEM1 blk [ACT/F1]
foreach [ITEM1 ITEM2] blk [ACT/F1]
repeat counter NUM [ACT/F1]
forever [ACT/F1]
for counter STARTNUM ENDNUM SKIPNUM [ACT/F1]
while[(calculation)= VAR][ACT/F1]
if (calculation) = VAR [ACT/F1]
either (calculation)= VAR [ACT/F1][ACT/F2]
do select blk source
FUNCTION1
FUNCTION2 ARG1
FIELD1/offset: FIELD1/offset + 5x5
set-face PROGRESS1 source
FIELD1/PROPERTY: VAR show FIELD1
show FIELD1
focus FIELD1
view/new layout VAR
parse source [any [thru "START" copy VAR to "END"
  (append BLOCKNAME:[] VAR)] to end]
FUNCTION1: does [ACT/F1]
FUNCTION2: func [ARG1] [ACT/F1]
if error? try [ACT/F1][ACT/F2]
attempt[ACT/F1]
send to-email NAME@URL source
make-dir %./FOLDER1/
change-dir %./FOLDER1/
rename %FILE1 %./FILE2
delete %FILE1
editor source
print source
probe source
browse to-url source
launch %FILE
call/show "NOTEPAD.EXE C:\FILE"
wait NUM
insert sound: open sound:// source wait sound close sound
6.3 Data Sources
Many actions require DATA SOURCES. For example, the 'alert' function alerts some text to the user. That text can be typed into the code explicitly between quotes, read from a file, a URL, or the clipboard, requested from the user, gotten from a mathematical evaluation, etc.:
view layout [
  btn "Random Letters" [alert random "abcdefg"]
  btn "Now" [alert form now]
  btn "Math Evaluation" [alert form 5 + 7]
  btn "Clipboard" [alert read clipboard://]
  btn "Web Site" [alert read http://rebol.com]
]
Label any GUI widget with a word followed by a COLON, and it can be used as the data source for an action:
view layout [
  FIELD1: field
  btn "Alert the text above" [alert FIELD1/text]
]
Here are a number of the most common data sources you need to be able to use. Any CAPITALIZED word represents a label/variable which can be changed to any other word that represents some sort of data/value/object, as you see fit:
"LITERAL"              ; "literal" could be any quoted text, a number,
VAR                    ; or other value typed directly into the code
value                  ; of your app
copy get-face FIELD1
CALCULATION
read target
read/lines target
load target
rejoin [VAR VAR2]
random 100 + 0
first random blk
NUM
now
now/time
request-list "TITLE:" blk
request-text/title/default "TITLE:" "DEFAULT TEXT"
request-color
request-file/only
request-date
request "QUESTION?"
to-TYPE VAR
type? VAR
as-pair VAR VAR2
trim STRING
parse VAR ","
reduce blk
last blk
head blk
pick blk NUM
find blk VAR
index? find blk VAR
at blk VAR
select blk VAR
reverse copy blk
extract blk NUM
extract/index blk NUM COLUMN
remove/part blk NUM
copy/part blk NUM
copy/part (at blk NUM) NUM
sort copy blk
length? blk
empty? blk
index? blk
mold VAR
form VAR
load VAR
do VAR
copy VAR
compress VAR
decompress VAR
encloak VAR VAR2
decloak VAR VAR2
to-url VAR
dehex VAR
checksum VAR
ask "TEXT"
FIELD1/property
TXTLST1/PICKED
read/binary target
target
ARG1
ITEM1
counter
pick blk counter
When reading/loading data, you'll most often use these read sources:
%FILE
clipboard://
http://URL.COM/PAGE.TXT
ftp://USER:PASS@URL.COM/public_html/FOLDER/FILE.TXT
VARIABLE-WORD-WHICH-POINTS-TO-A-READ-SOURCE
As you progress with the app builder and with learning Rebol, you'll need to learn about the many data types which are built into the language (MANY more than in most other common programming languages). When retrieving values from data sources which hold strings of text (GUI fields, the system clipboard, etc.), use 'to-
' and/or 'load' functions to convert the string values to data types which can be used in evaluations. Arithmetic with dates/times, coordinate pairs, IP addresses, colors, etc., is easily performed, money is rounded properly, URL/file values can be read from and written to, etc., when properly formatted data type values are used. The key to understanding datatypes is that when values are written in a particular format/syntax, Rebol inherently knows how to perform appropriate computations with them. For example, 6-feb-2017 - 27-may-1972 computes the number of days between the 2 date values, 22x34 - 13x23 computes both the x and y distances between the 2 coordinate pair values, etc. Type 'help "!"' in the Rebol console, and read the Rebol docs to learn more about performing computations on the built-in Rebol data types. To convert any data type to a quoted string of text, use the 'form' function. You'll see that the 'form function is included automatically in appropriate selectable Actions in the App Builder.
6.4 Blocks (Series) - Rebol Data Structures
In Rebol, lists of items called 'blocks' or 'series' are contained within square brackets. Label a block with a variable word (VAR1), followed by a COLON:
MYITEMS: ["ITEM1" "ITEM2" "ITEM3"]The 'foreach' function is used to do something to/with every item in a block of data:
foreach ITEM MYITEMS [alert ITEM]Variable words can be any text you choose. These 2 lines do the exact same thing as the 2 lines above:
m: ["ITEM1" "ITEM2" "ITEM3"]
foreach i m [alert i]
Here are some of the common sources of block data:
copy []
copy ["ITEM1" "ITEM2" "ITEM3"]
copy [1 2 3]
load %FILE
load http://URL.COM/PAGE.TXT
read %./
load clipboard://
system/locale/months
system/locale/days
VAR
6.5 Functions
You can include ACTIONS INSIDE A BLOCK, and give that block a label. Multiple actions are typically placed on separate indented lines, but indentation is not required:
COUNT: [
  alert "One"
  alert "Two"
  alert "Three"
]
Execute a block of actions with 'do':
do COUNTA block of actions can be made to run whenever a user interacts with a GUI widget:
view layout [
  btn "Count" [do COUNT]
]
Actions can be enclosed in a named 'function' block, which runs every time the name of the function is called:
COUNT: func [] [
  alert "One"
  alert "Two"
  alert "Three"
]
view layout [
  btn "Count" [COUNT]
]
The main benefit of functions is that you can add 'argument' ('parameter') values to be used by the function:
SAYMANTRA: func [PHRASE] [
  alert PHRASE
  alert PHRASE
  alert PHRASE
]
view layout [
  btn "Repeat mantra" [MANTRA "I am good enough, strong enough..."]
]
You now understand enough about the Rebol language to understand the code created by the appbuilder:
do http://re-bol.com/appbuilder/APPBUILDER.rGive it a try!